
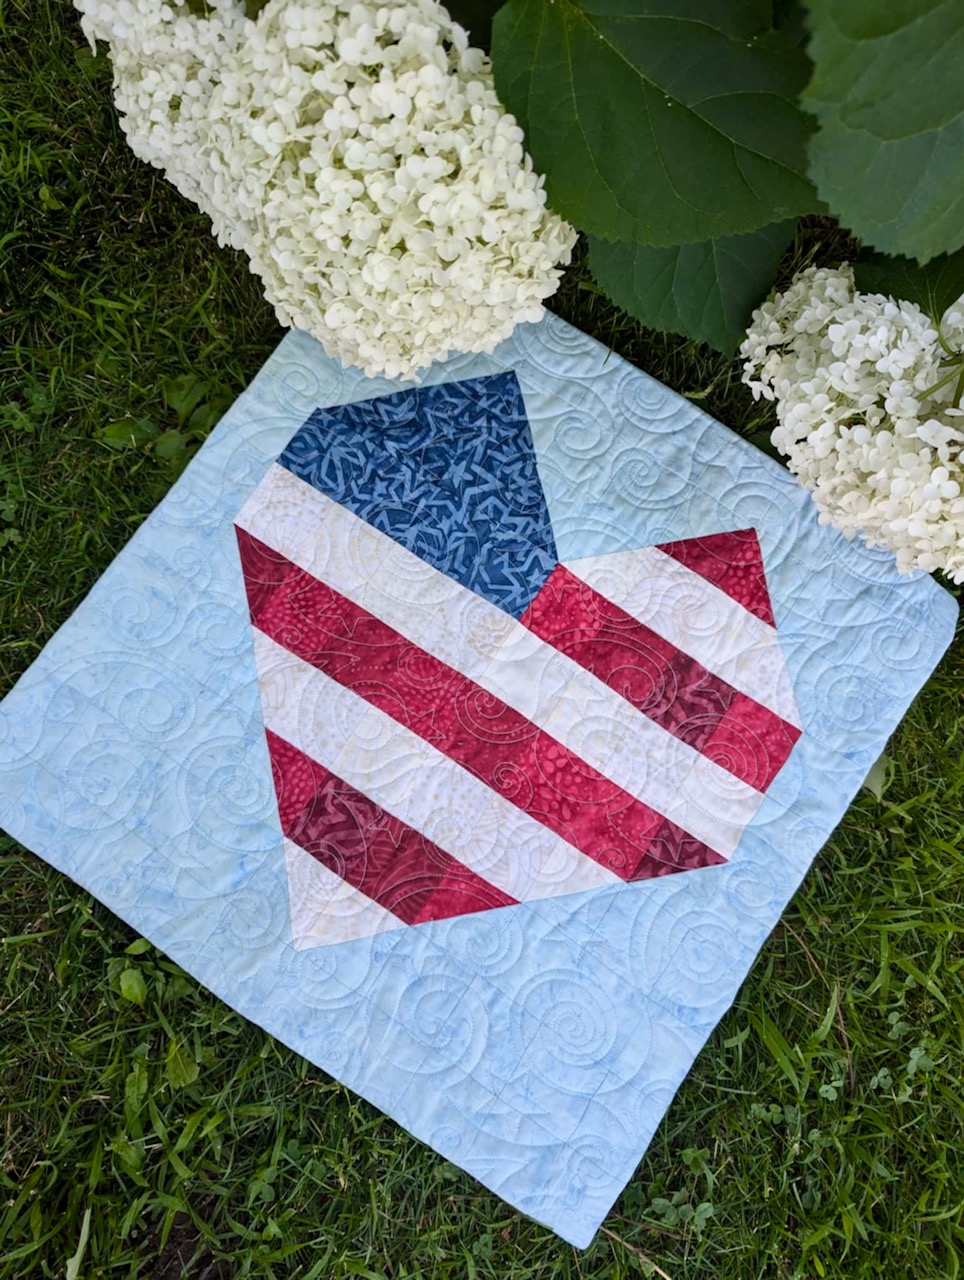
This pattern started as a Scrappy Valentine Quilt, but I’ve been adapting it for other occasions. We are calling this version, “Land That I Love” to celebrate the 4th of July. It is super easy to make and goes together in just a few hours.
Supplies Needed:
1/3 yard light blue fabric for background
Scraps of red, white, and dark blue fabric, OR, (1) fat eigth each of red, white, and dark blue fabric
2/3 yard piece of fabric for backing and corresponding batting
Coordinating thread
Sewing supplies including rotary cutter and ruler, pins, sewing machine with new needle, snips and an iron.
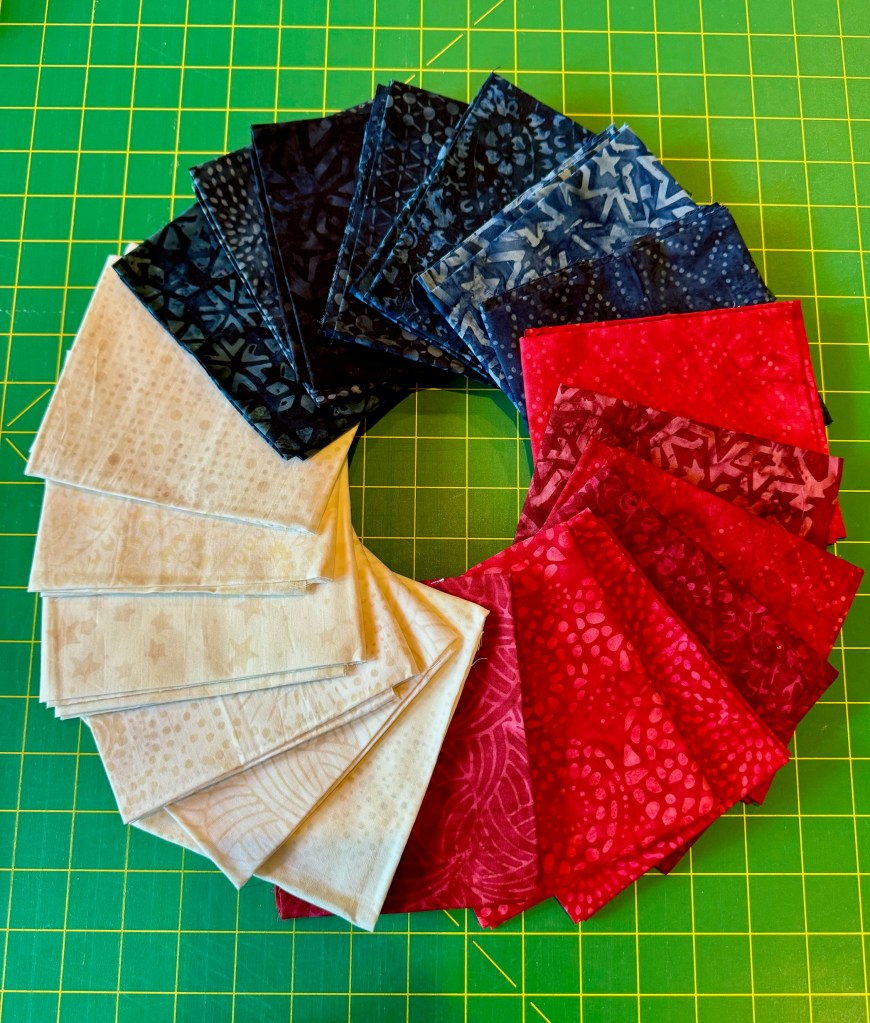
For our heart/flag quilt, we used Liberty batiks by Timeless Treasures.
Instructions:
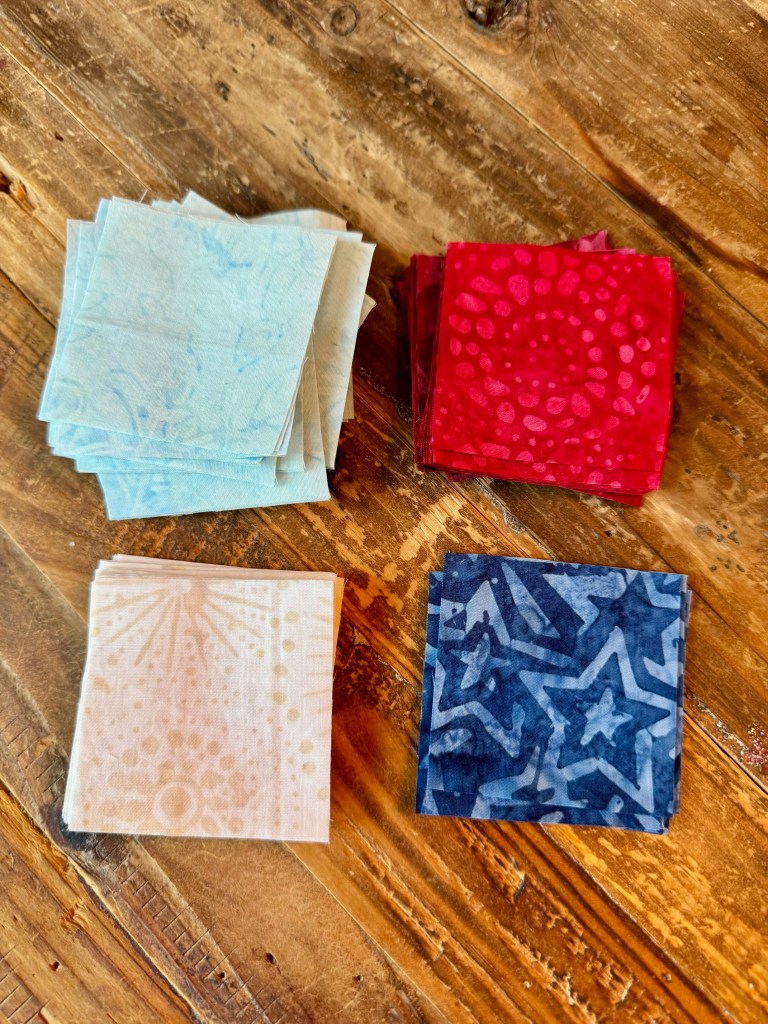
From your light blue background fabric, cut (4) 2.5″ x width of fabric (WOF) strips. Sub-cut into (68) 2.5″ squares. Save remaining light blue fabric for binding.
From your red fabric, cut (18) 2.5″ squares.
From your white fabric, cut (20) 2.5″ squares.
From your dark blue fabric, cut (10) 2.5″ squares.
Next make half-square triangles (HST) as follows:
Light blue / dark blue – make 4
Light blue / red – make 6
Light blue – white – make 6
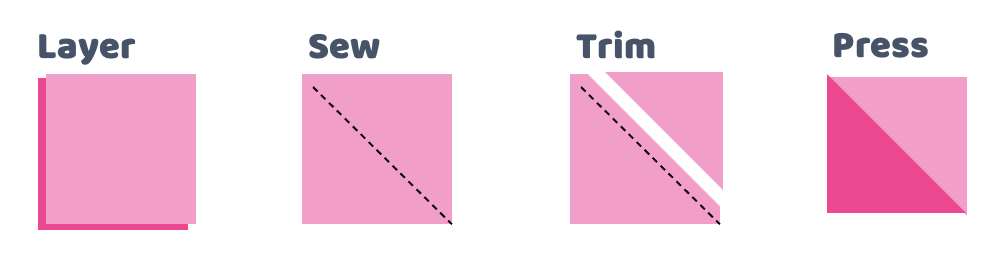
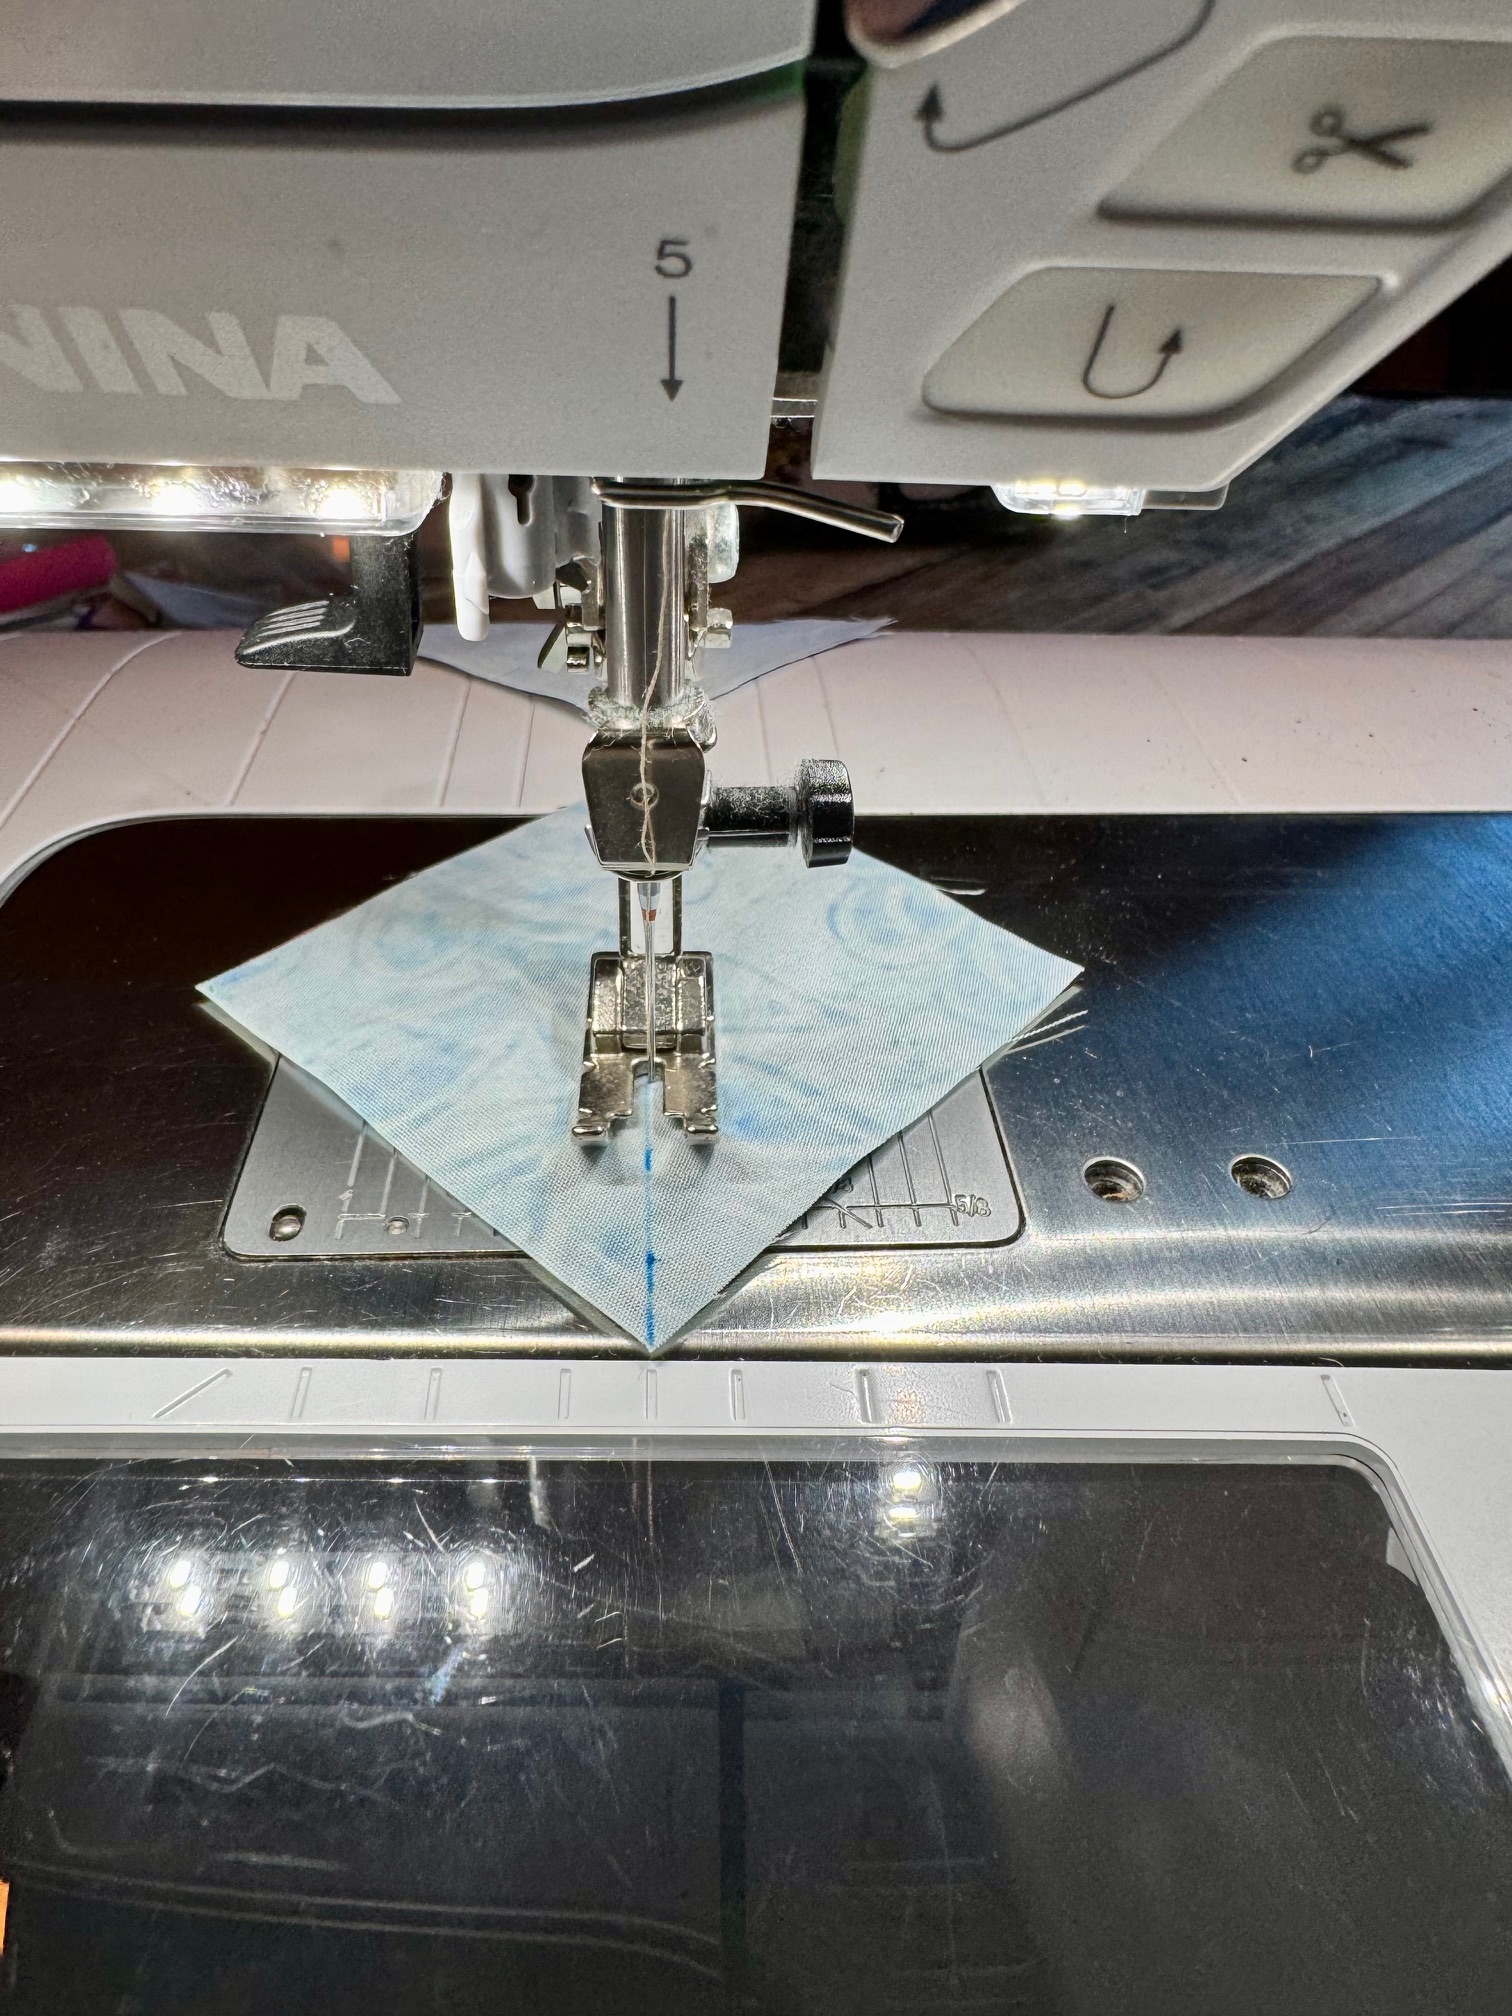
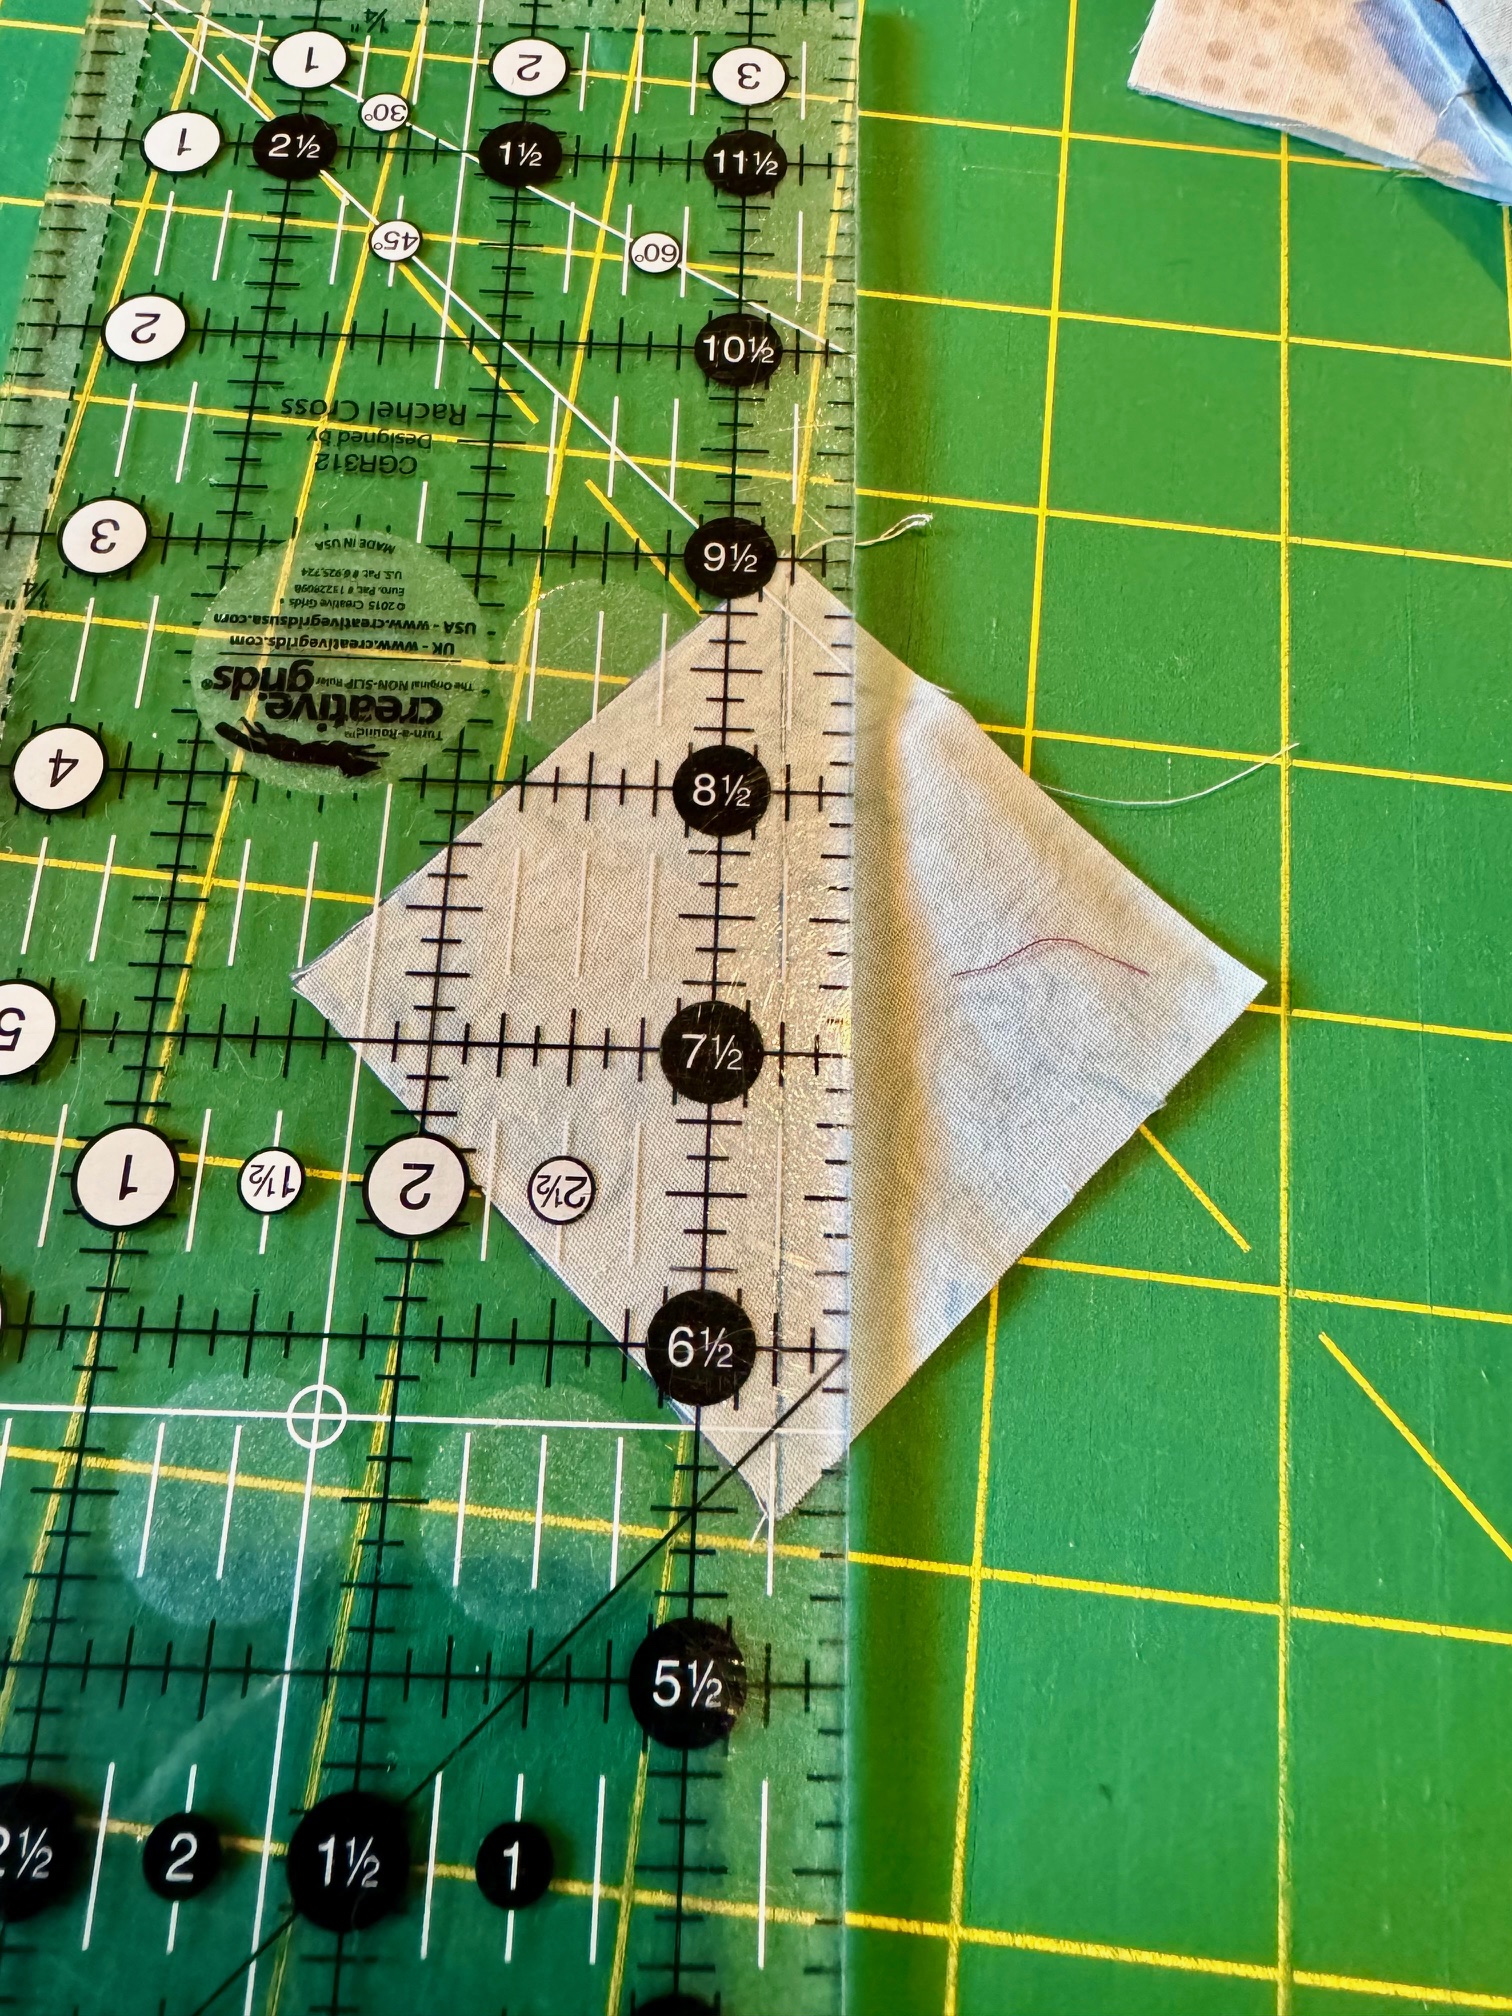
To make your HST, use a ruler and pencil to draw a line from corner to corner diagonally on (16) light blue squares.
Layer a light blue square on top of the appropriate colored square, right sides together, and sew on the drawn line.
Trim 1/4″ from your seam and discard the scraps. (Or, pull a Katy and sew them together to make something else!) Press your HST, pressing the seam open.
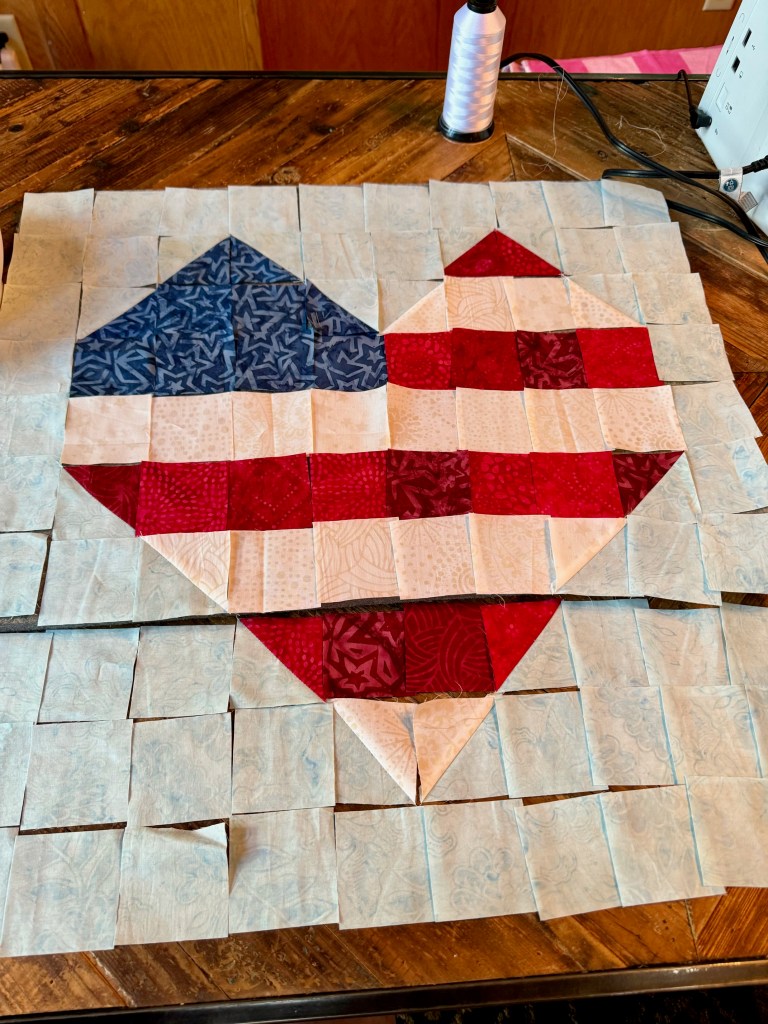
Arrange your squares and HSTs into a flag heart as shown. You will have ten rows of ten each.
Sew your squares into rows, pressing the seams from each row in alternate directions.
Sew your rows together to form the finished quilt top.
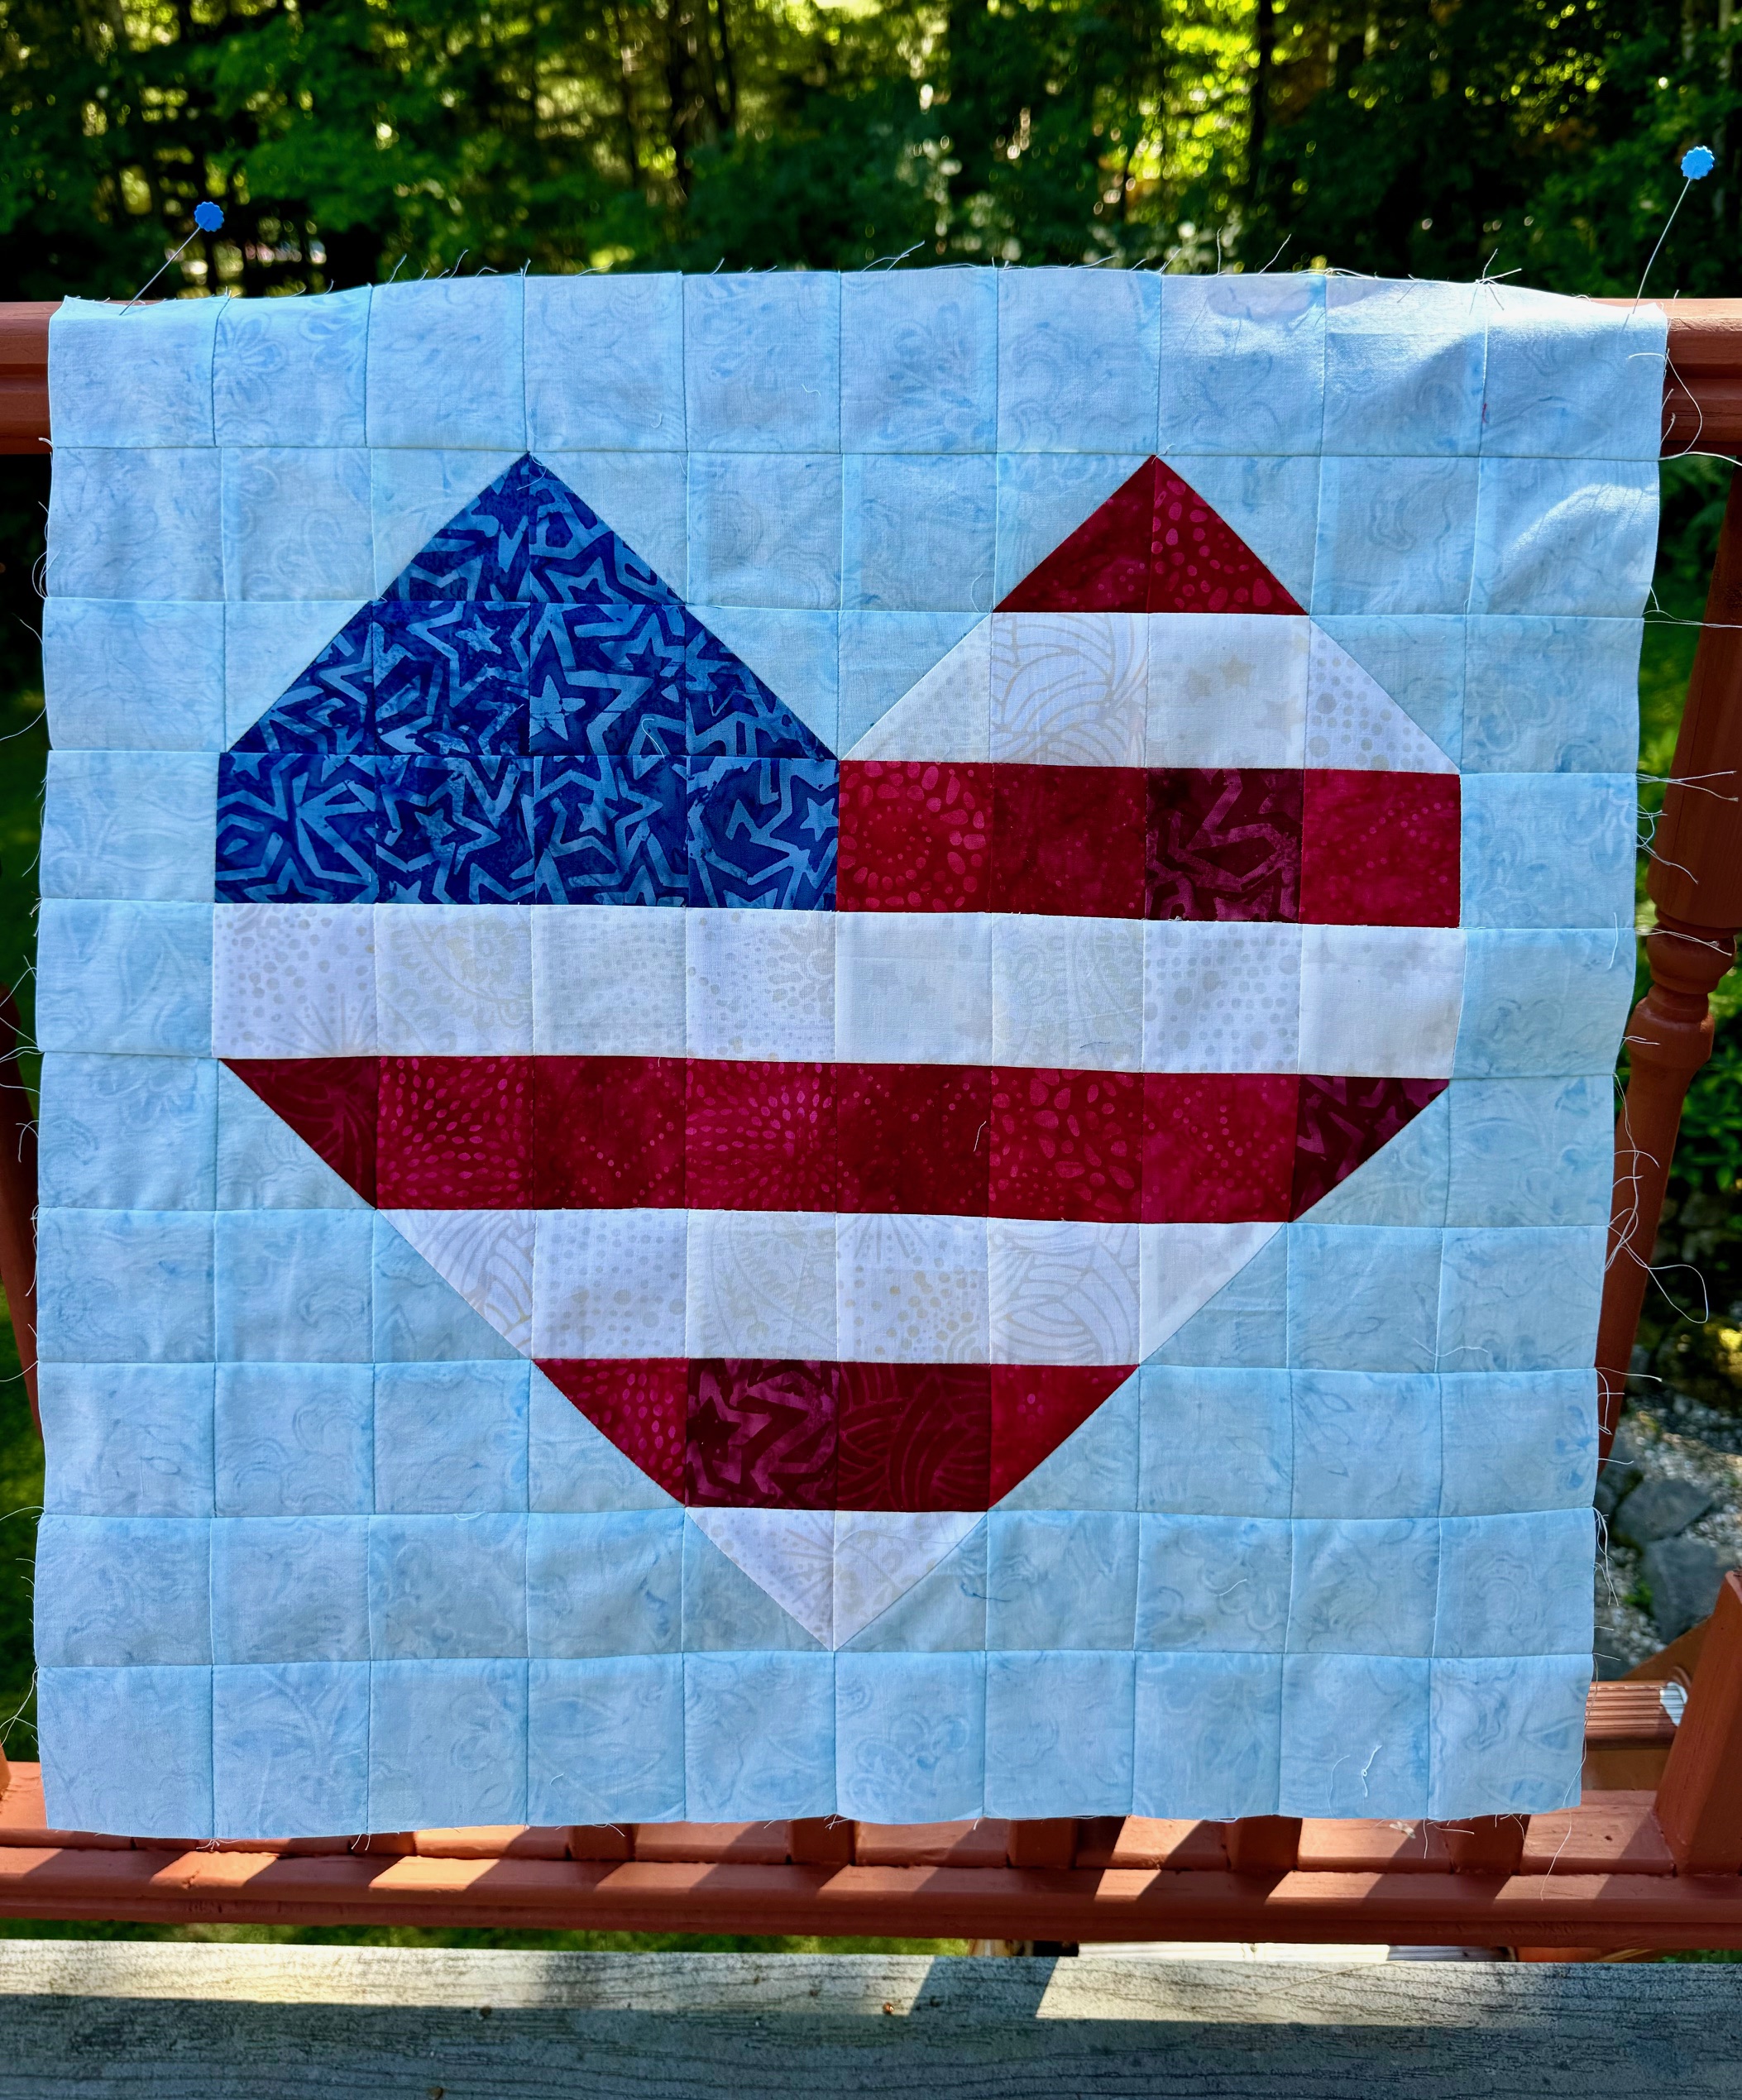
Quilt and bind as desired. Katy quilted this for me using a star and swirl allover in a light blue thread. We did a facing binding to create a clean edge.
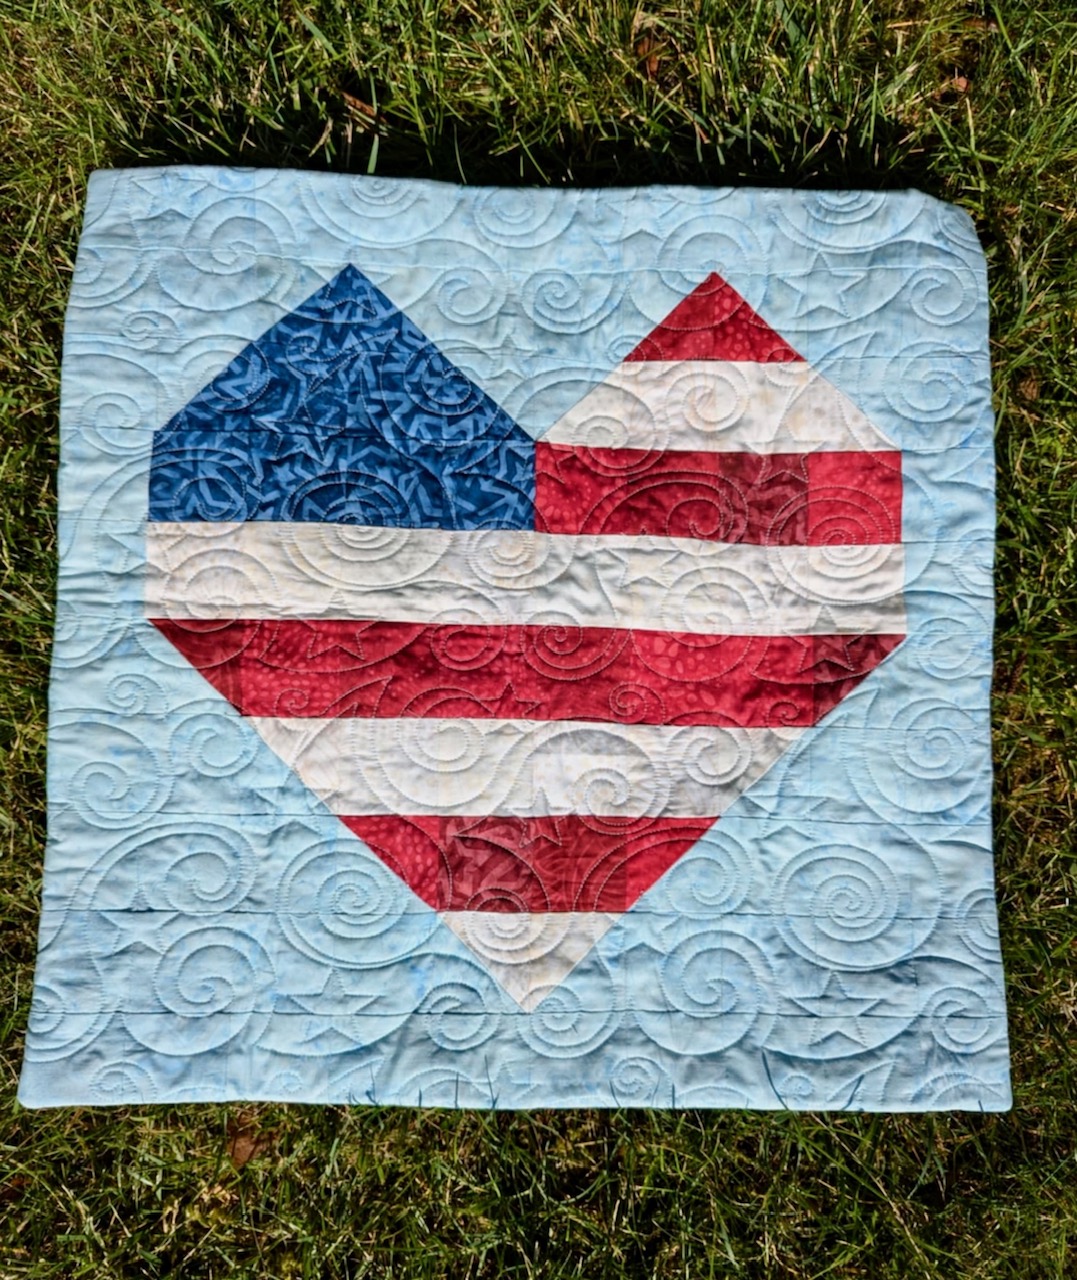
Our quilt finished to 20″ x 20″. You can make your quilt smaller or larger by adjusting the size you cut your squares at the beginning as shown below. Obviously, the larger you make you squares, the more fabric you will need.

Thanks for reading! If you make this quilt please tag us with #cottoncandyfabrics so we can see your creation!

[…] Flag” is a Free Patriotic Quilt Block Pattern designed by Corey from Coriander Quilts!“Land That I Love” is a Free Patriotic Quilt Block Pattern designed by & from Cotton Can…“Ribbon Star” is a Free Patriotic Quilt Block Pattern designed by Julie Cefalu from The […]