
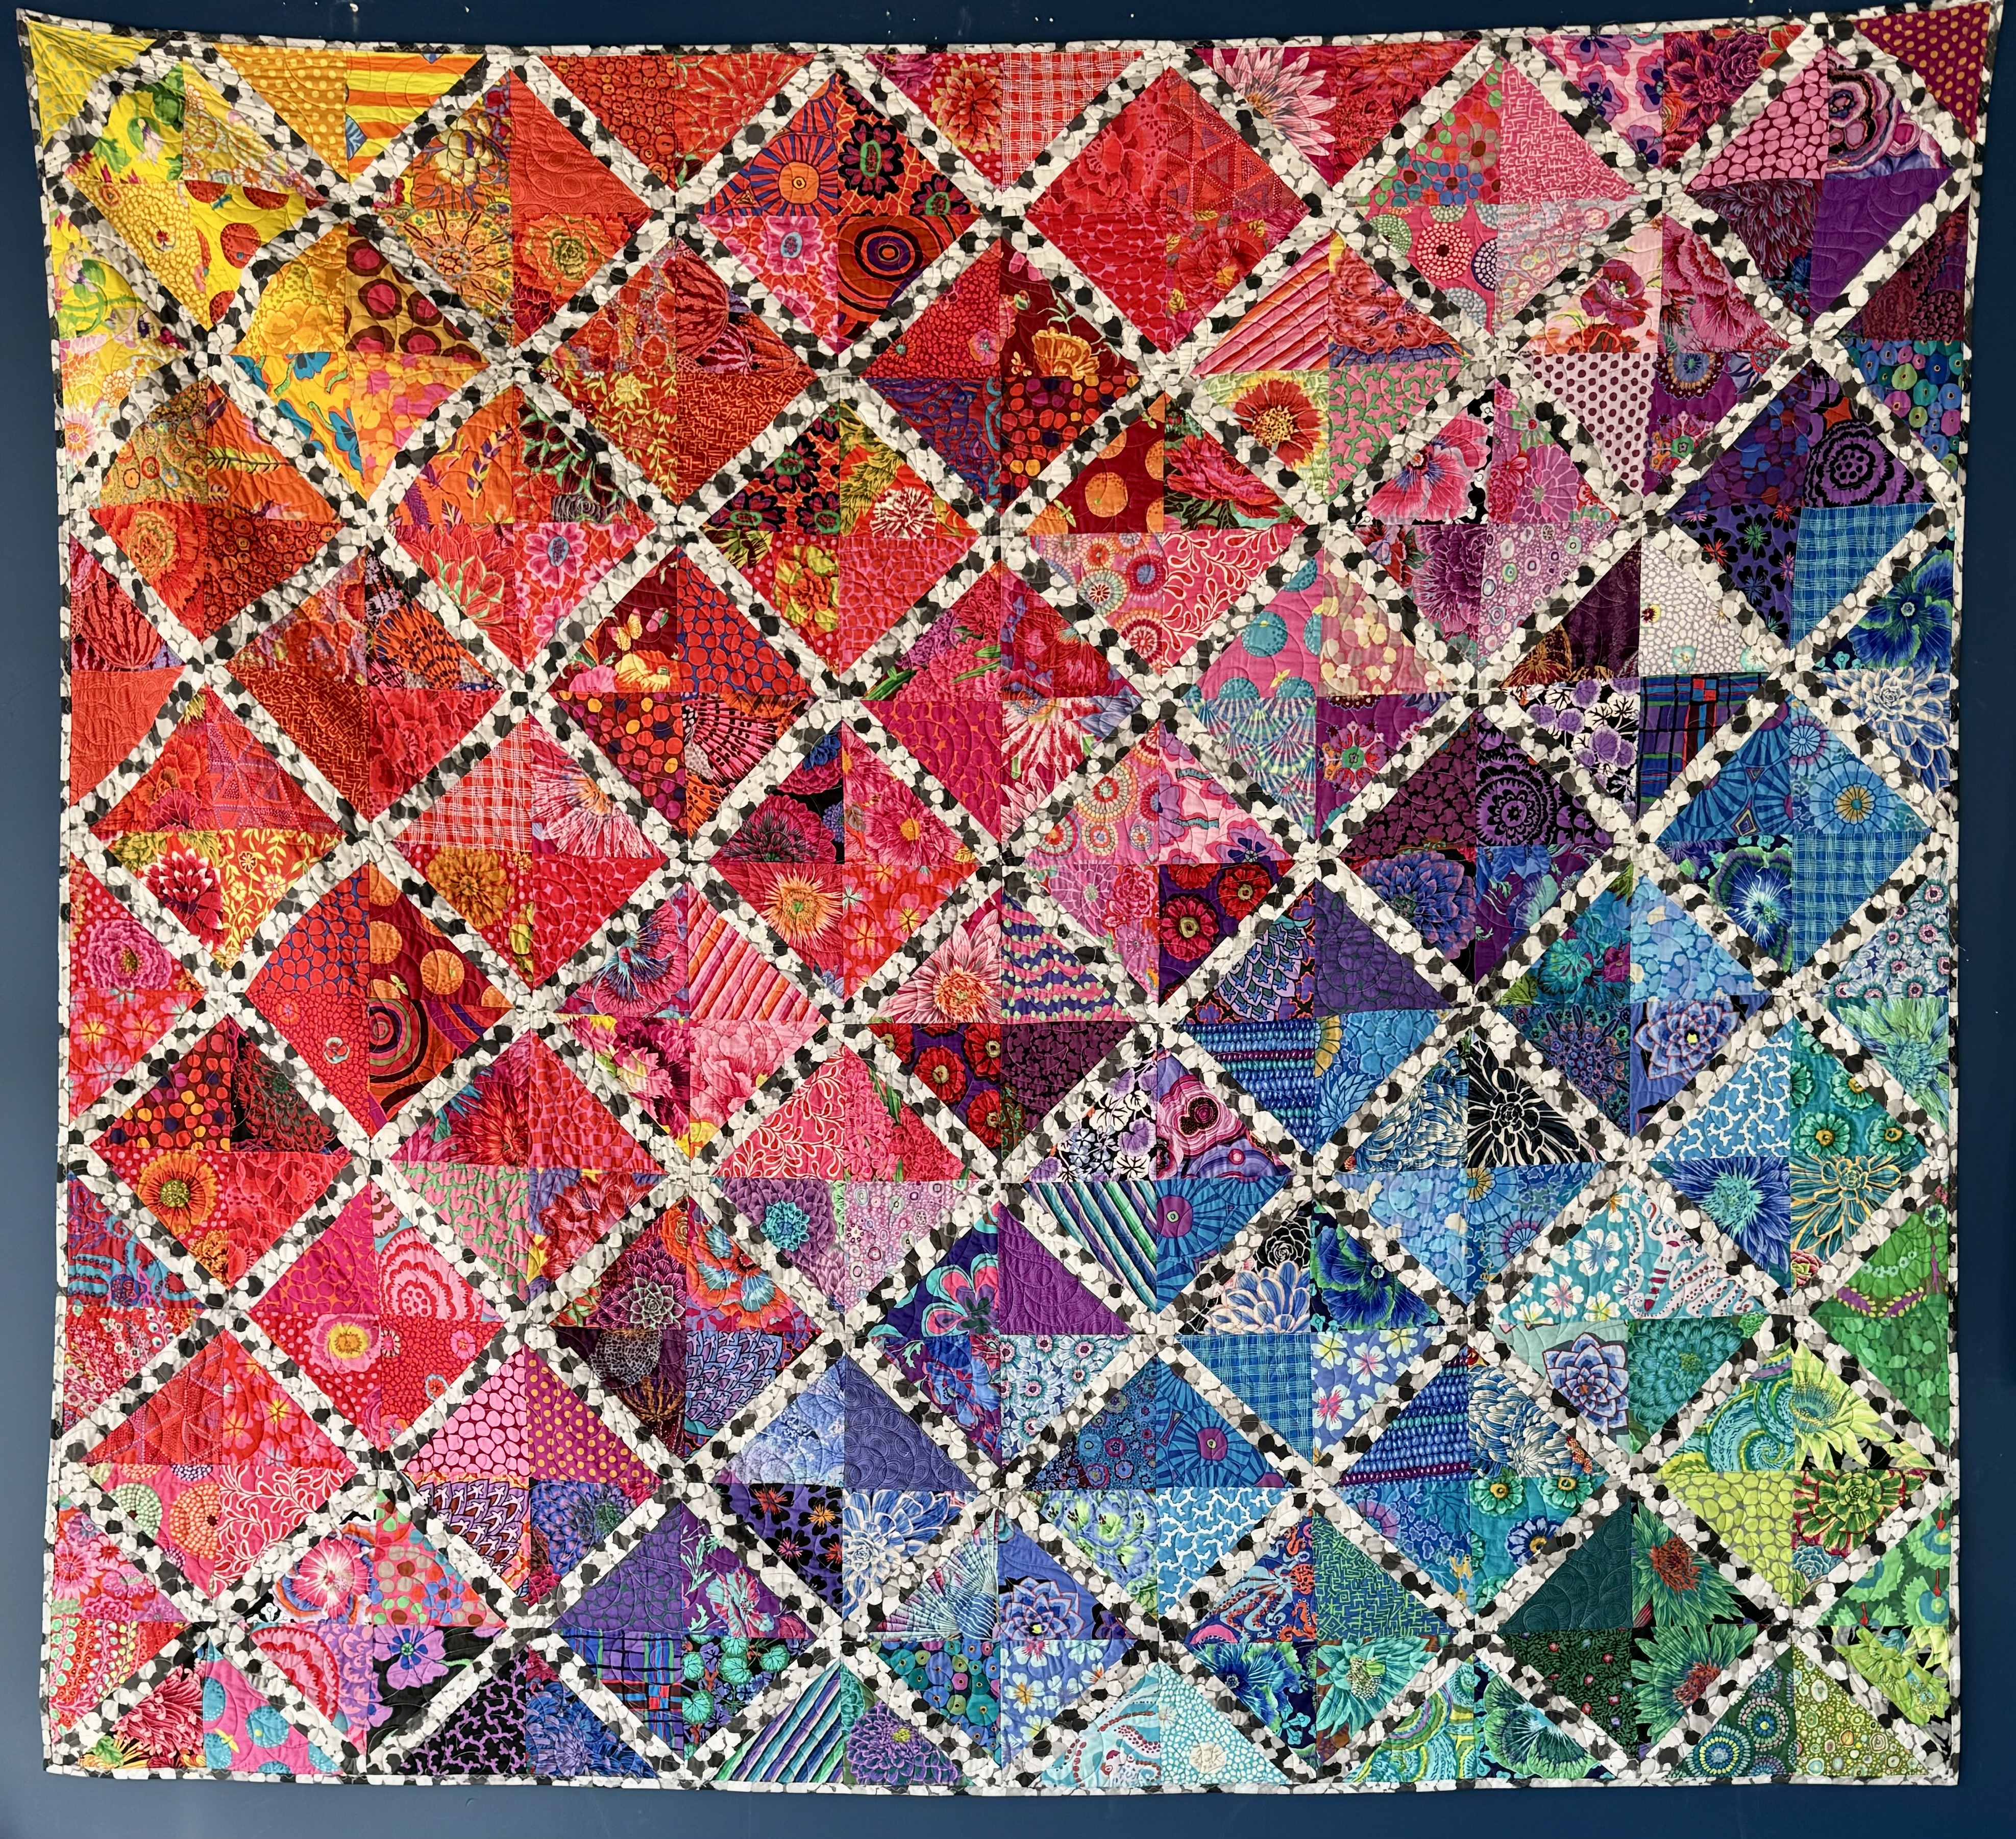
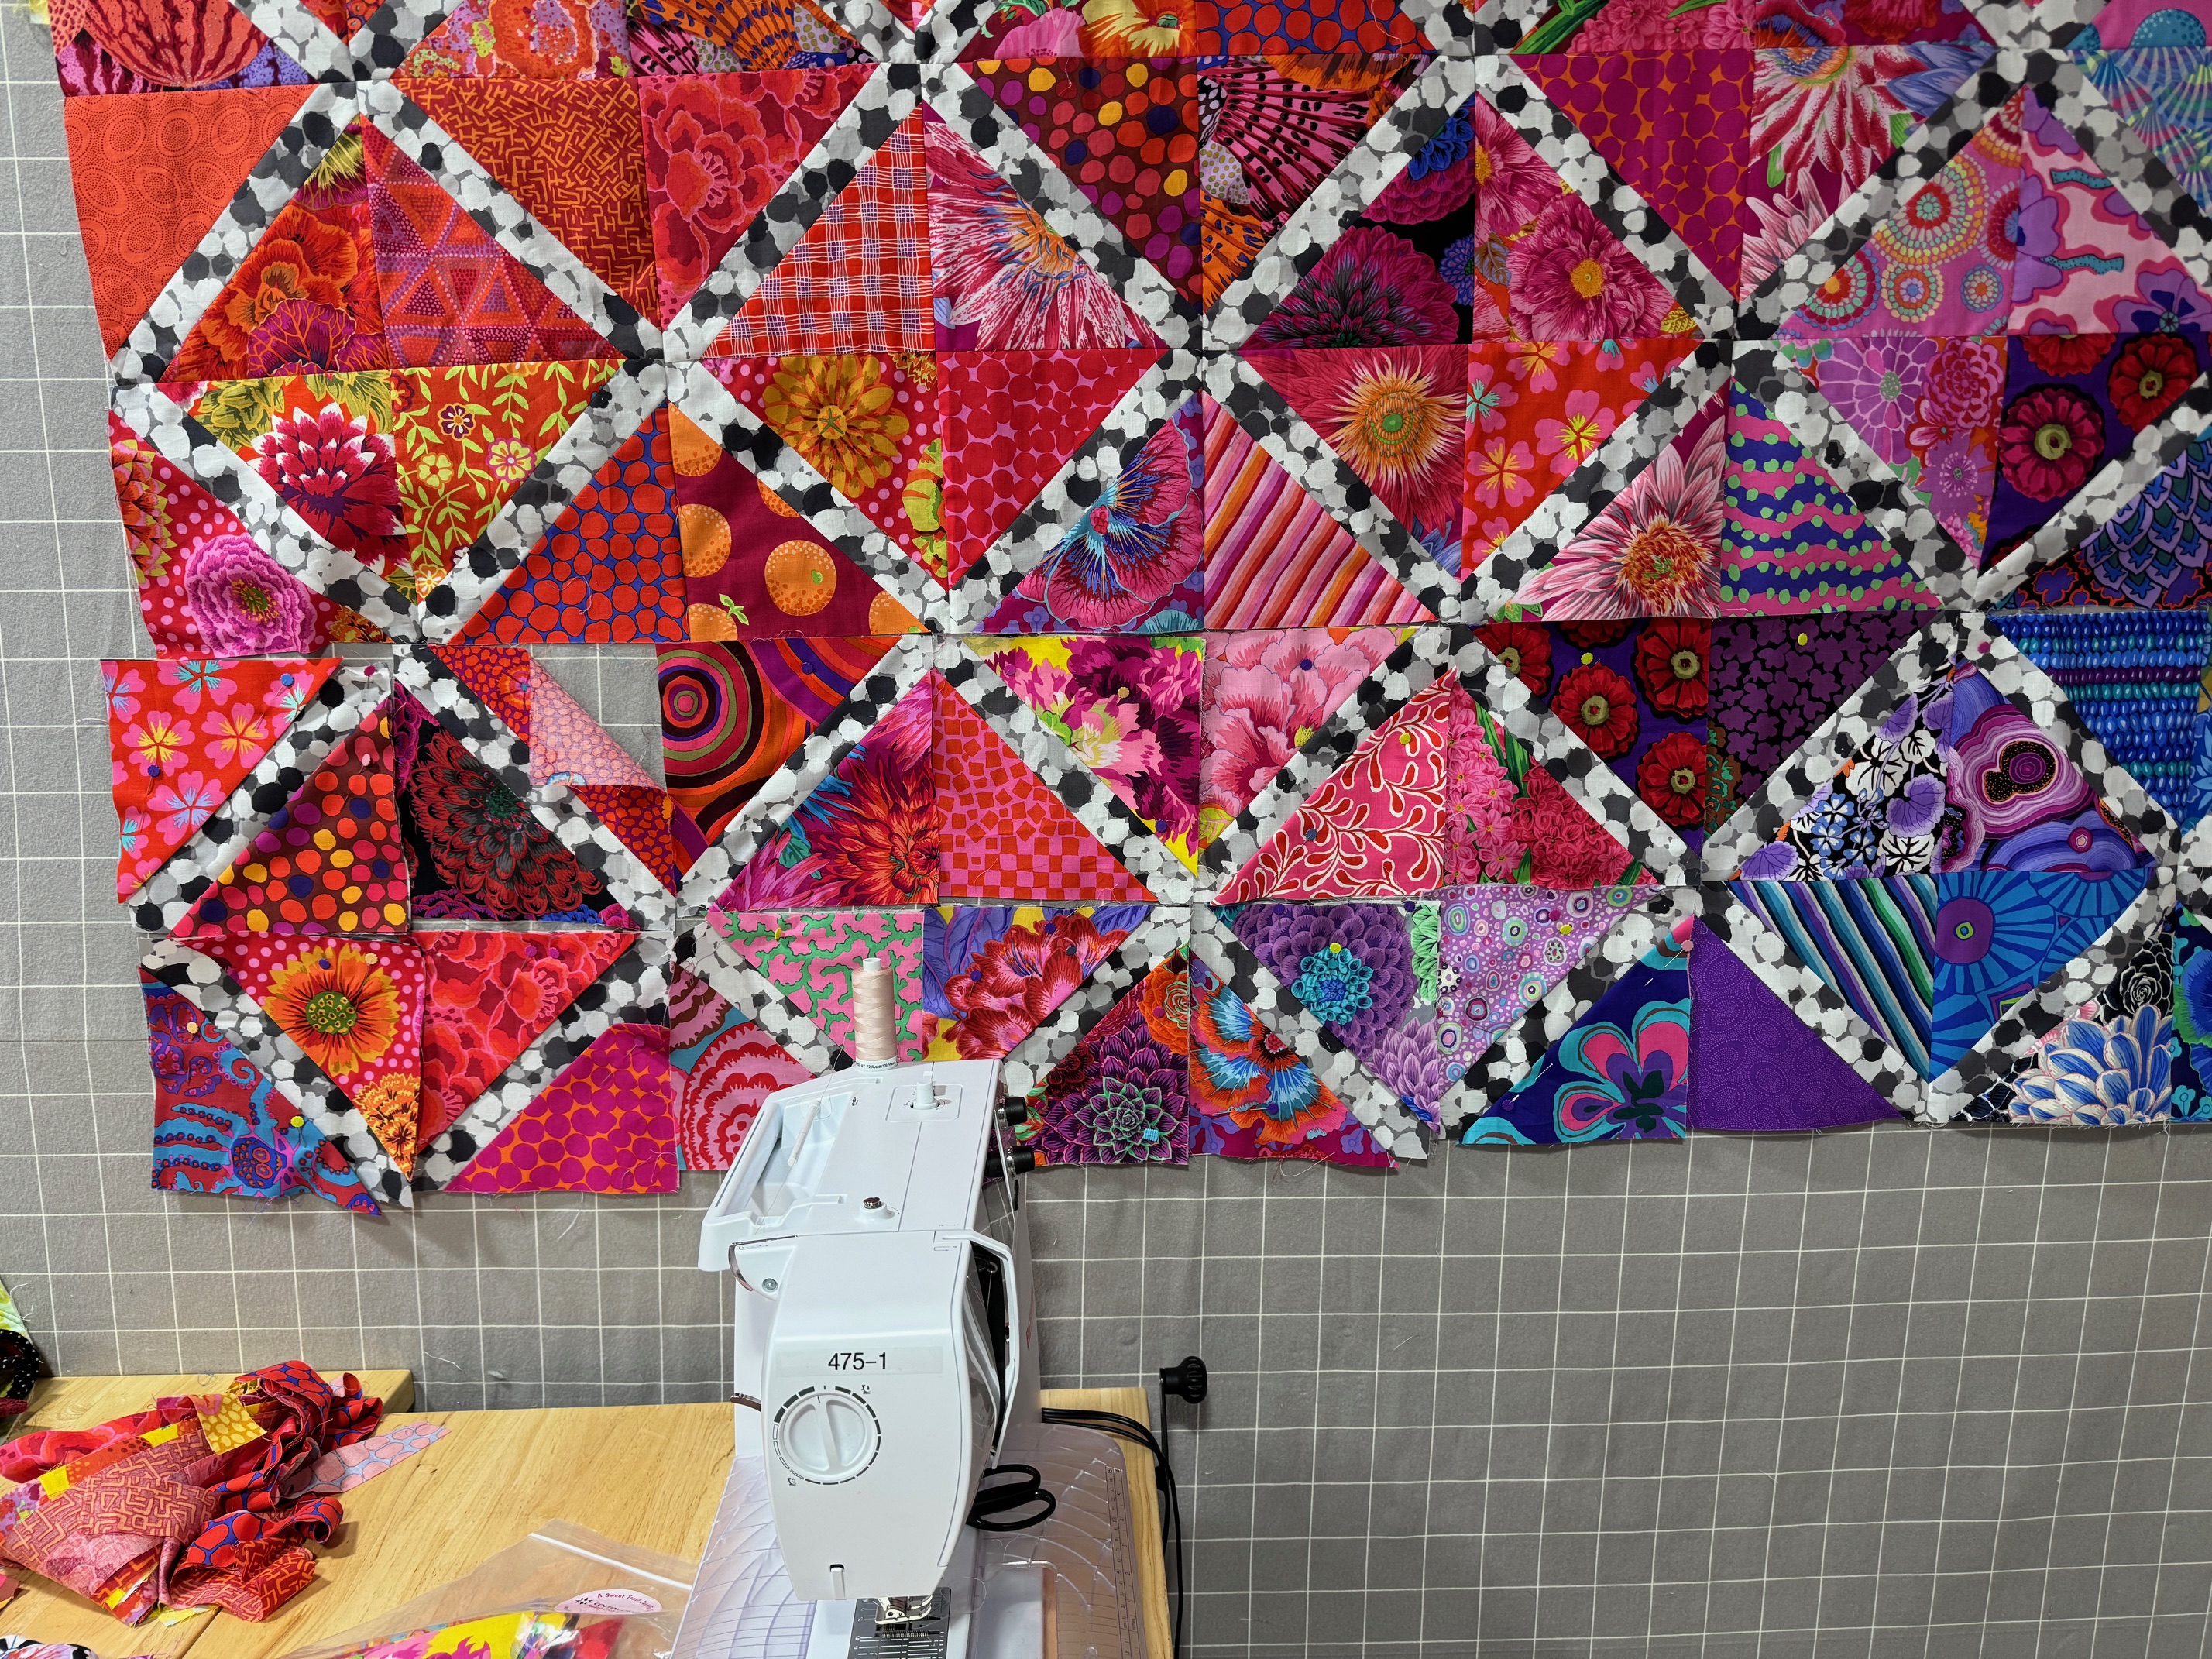
I made this quilt as one of the samples when Kaffe Fassett and Brandon Mably visited Cotton Candy Fabrics in September. I wanted a gradient rainbow of Kaffe Fassett Collective Fabrics, manufactured by Free Spirit Fabrics. Clearly you can tell how much I like the reds and pinks from how dominant they are in the finished project.
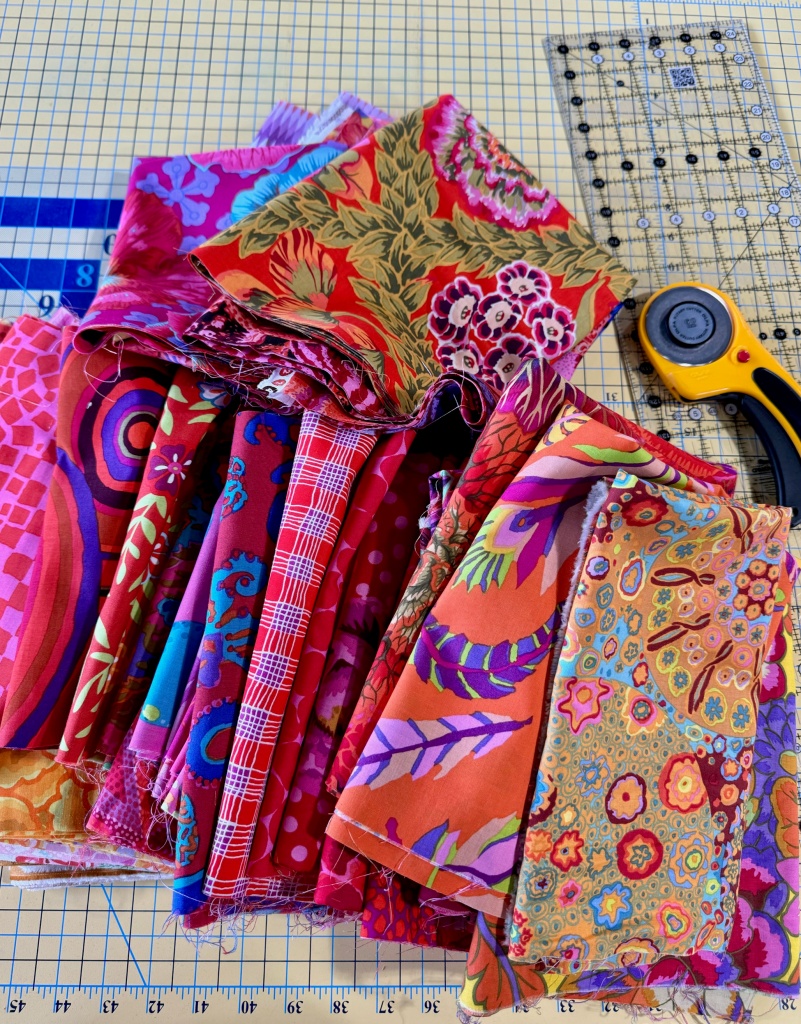
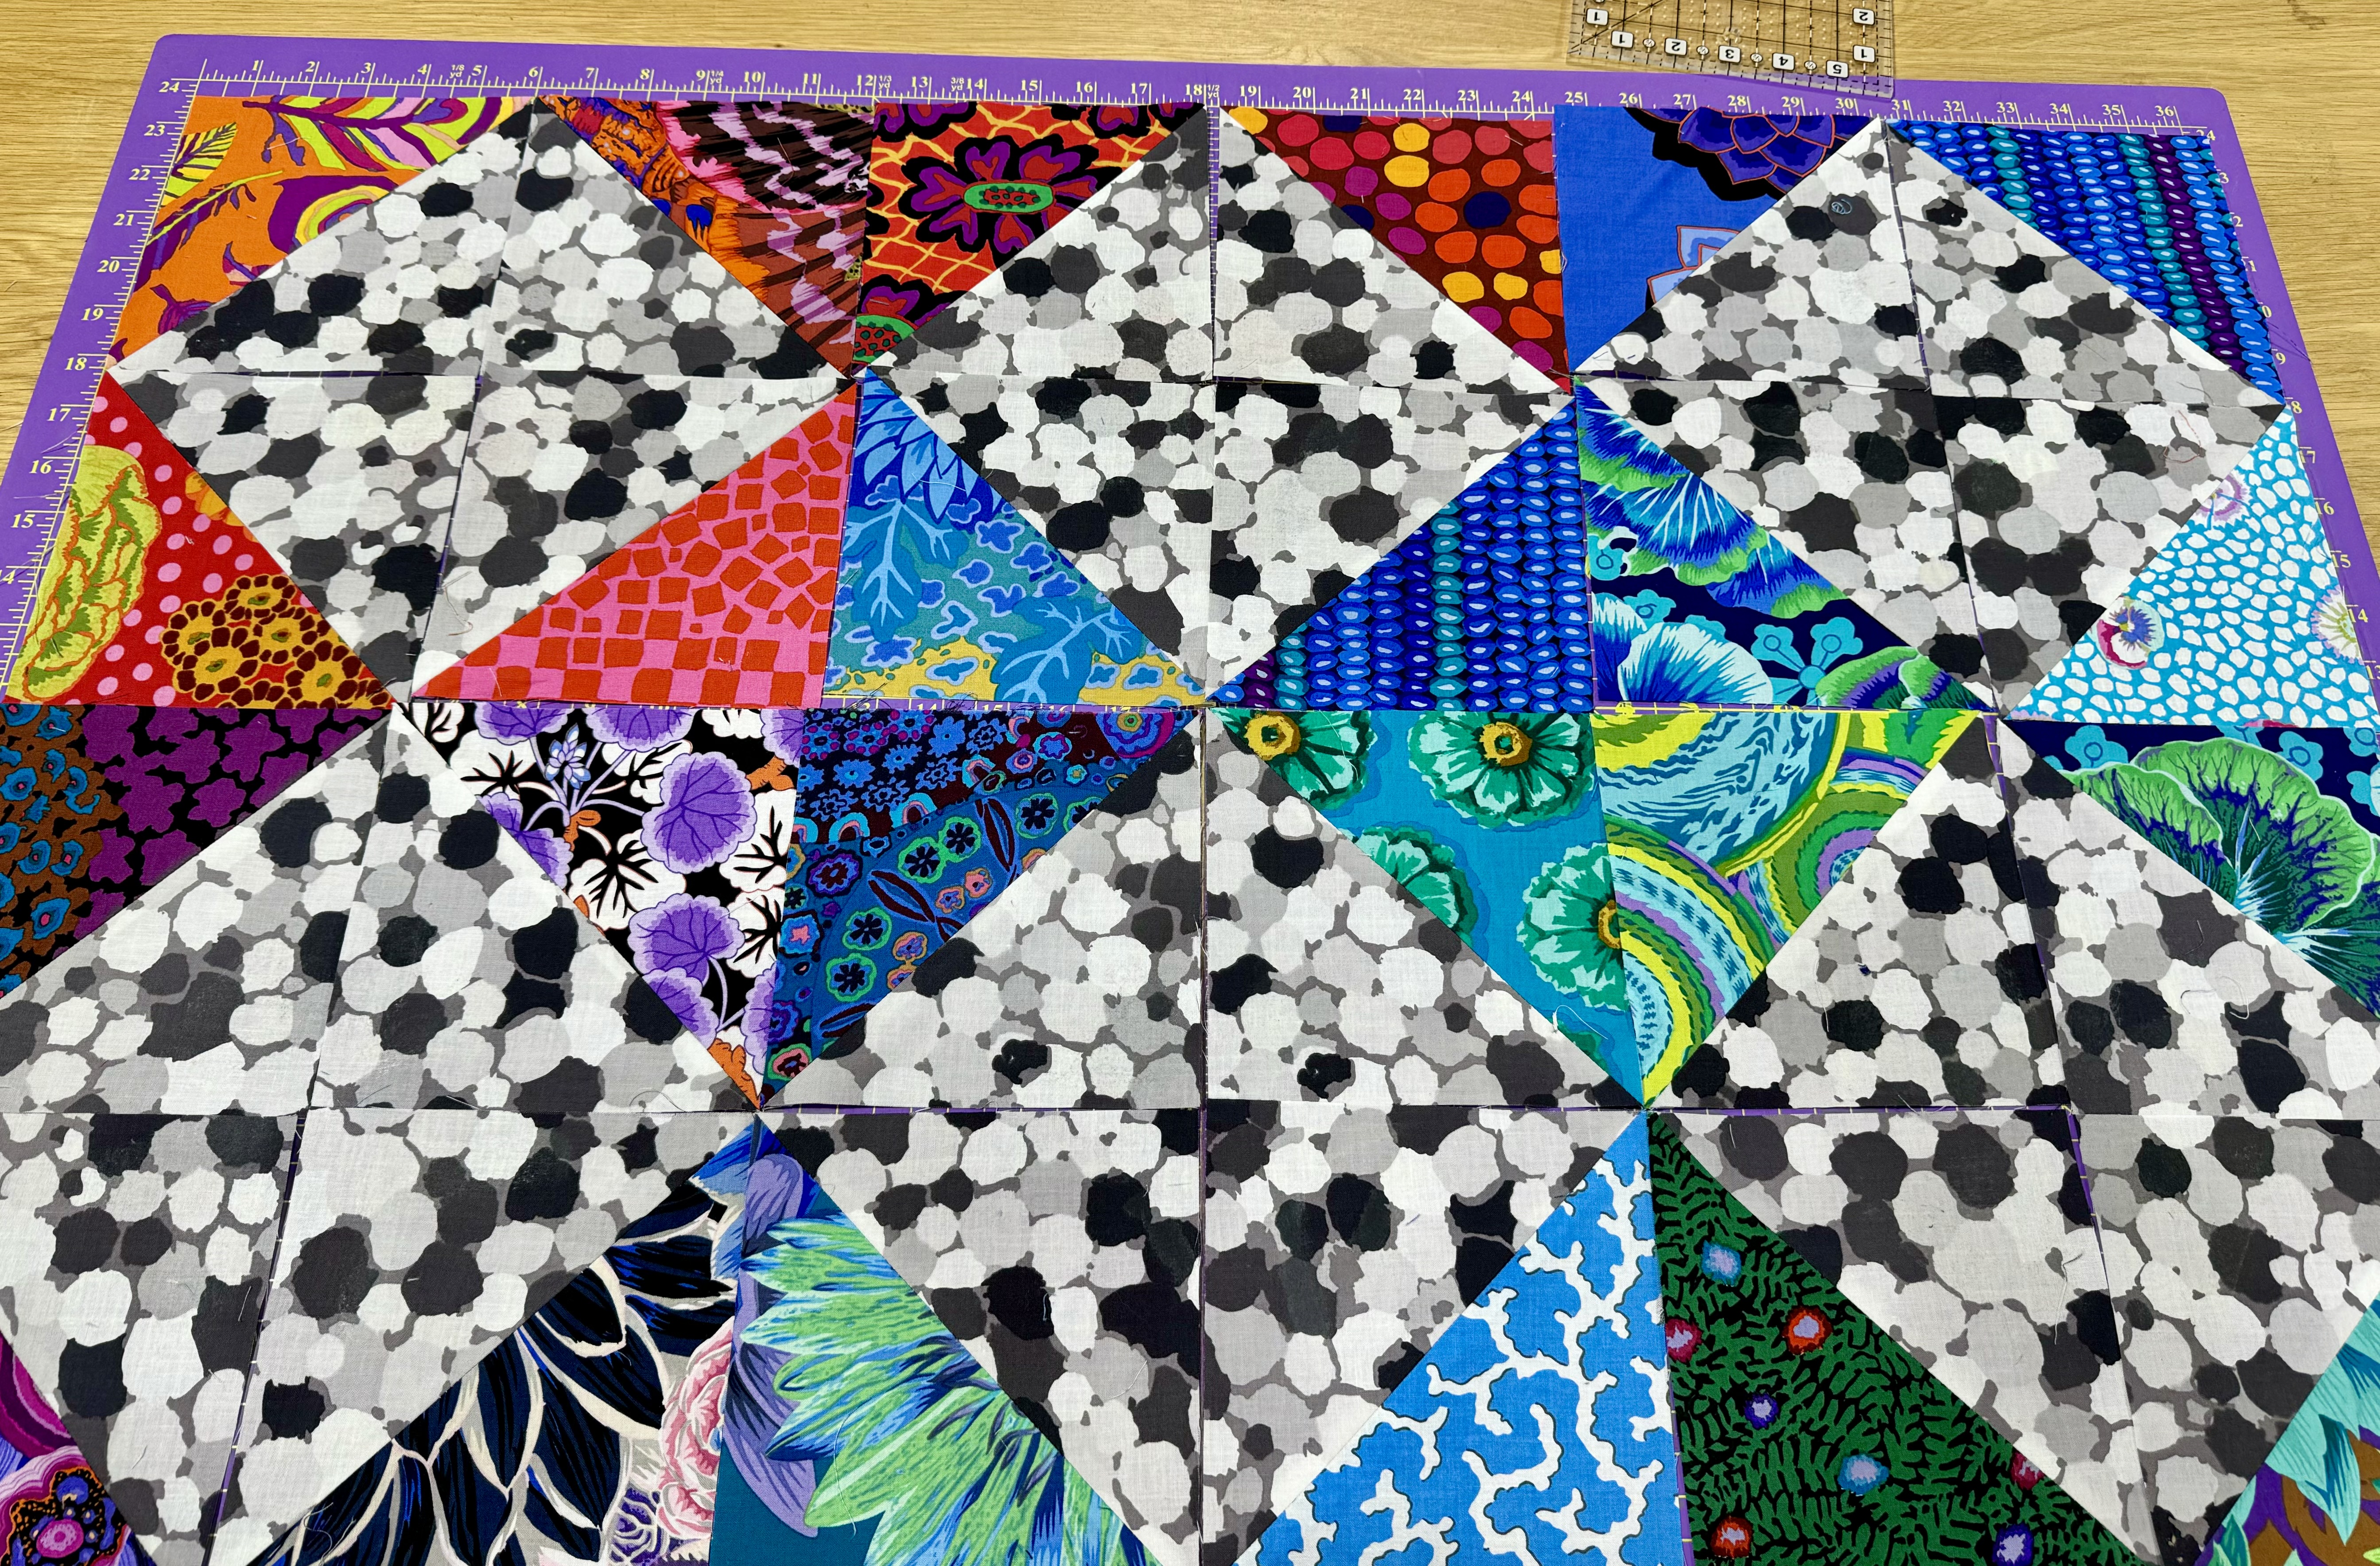
To make this quilt you will need a lot of the background fabric, as represented by the grey and white jumble above. You cut that into squares to use as a foundation, and then sew two smaller colored squares on top of the foundation to create the block. This gives you fabric to trim to use for other purposes. So, here are my instructions to make a 96″ x 88″ top.
Fabric Needed:
– 6.5 yards of background fabric (grey/white jumble above)
– 264 assorted 7.5″ squares of colored prints (all the colored prints above)
– 2/3 yard binding fabric (I used the same fabric as the background)
Note that I used all Kaffe Fassett fabrics, but you can use any theme or color story you’d like, or try a scrappy version.

Optional Supplies Recommended:
– Rotary cutter with a new blade
– Rotary cutting mat
– 8.5″ x 24.5″ Creative Grids ruler
– 8.5″ square Creative Grids ruler
– 7.5″ square Creative Grids ruler
– 3.5″ x 12.5″ Creative Grids ruler
– Marking pen
– 505 temporary glue stick
– Mini iron
– Wool pressing mat
Cutting Your Fabric:
First, cut your background fabric into (132) 8.5″ squares. You can get (5) squares from each 8.5″ strip of fabric.
Then, from your assorted colored prints, cut (264) 7.5″ squares. You do NOT need to fussy cut your fabric.
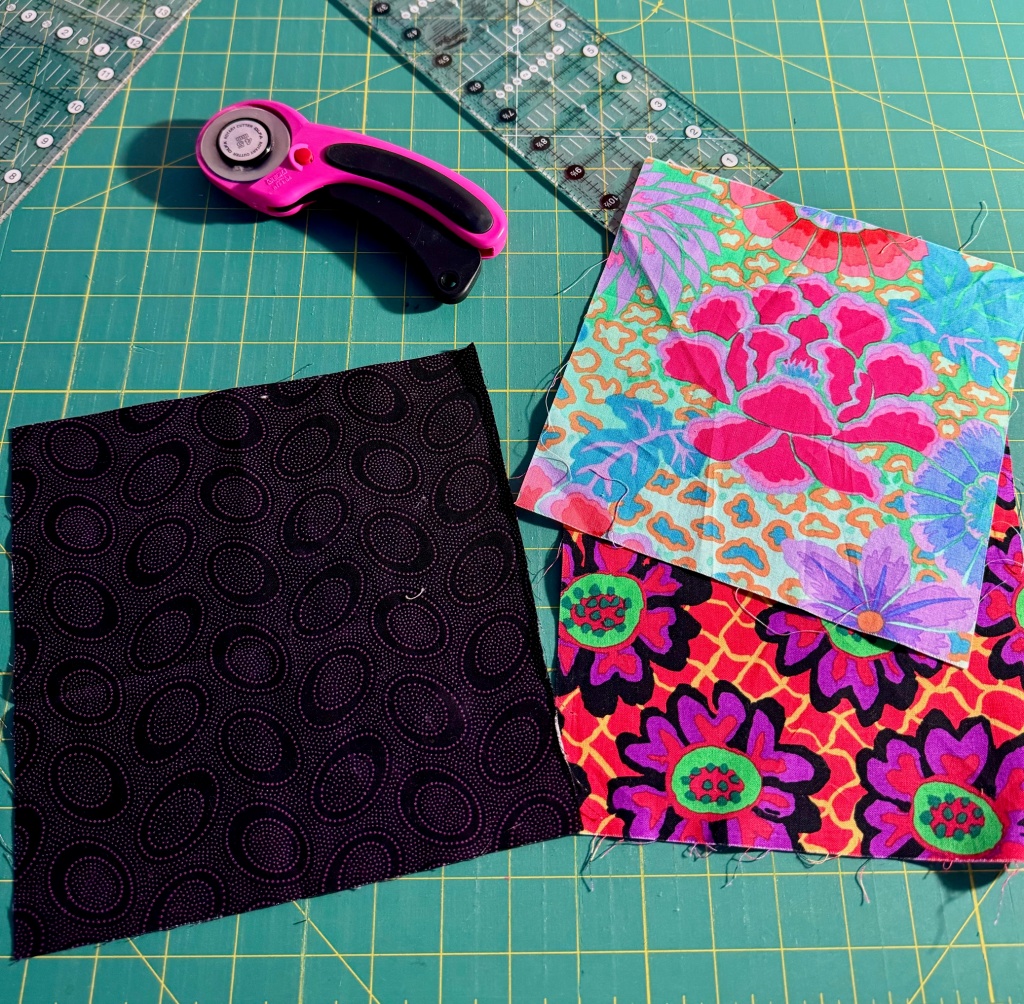
Each block requires (1) 8.5″ square of background as shown by the dark fabric in the photo and (2) 7.5″ squares of prints.
Assembling Your Blocks:
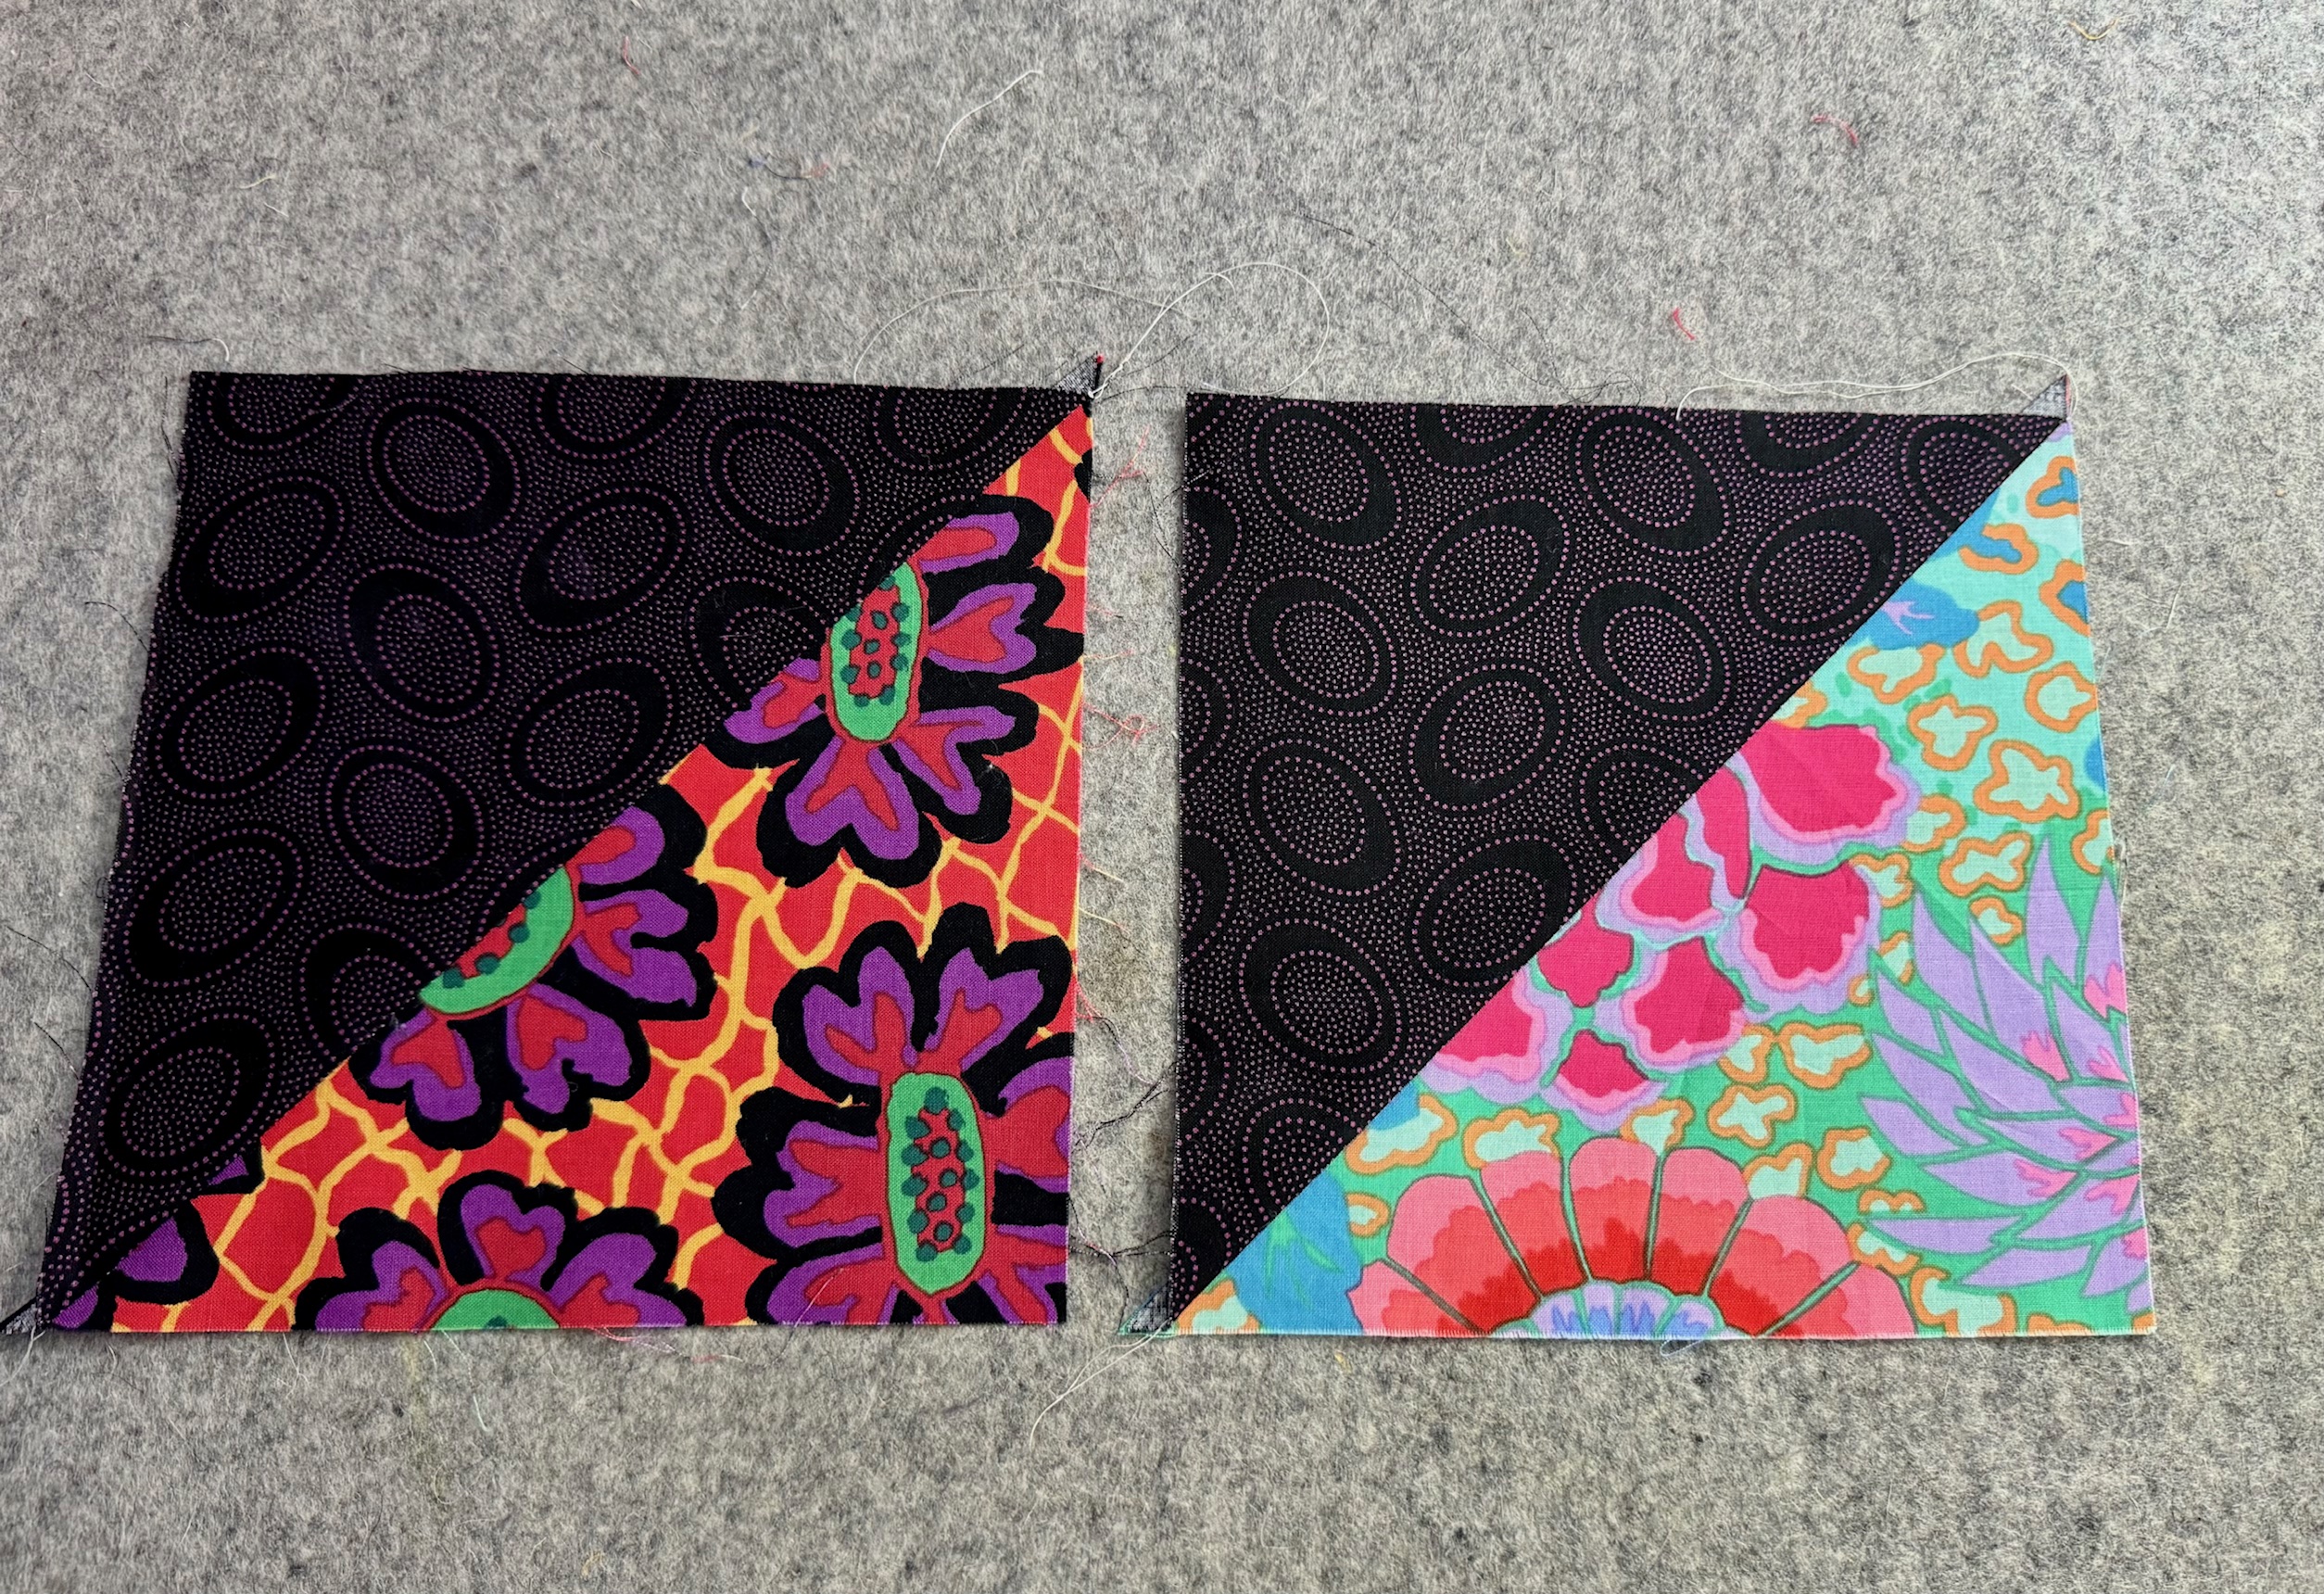
Start by drawing a line on the wrong side of your fabrics, from one corner diagonally to the other.
Position one print over one background square, aligning two corners. Use a dab of the glue stick to hold the fabrics together.
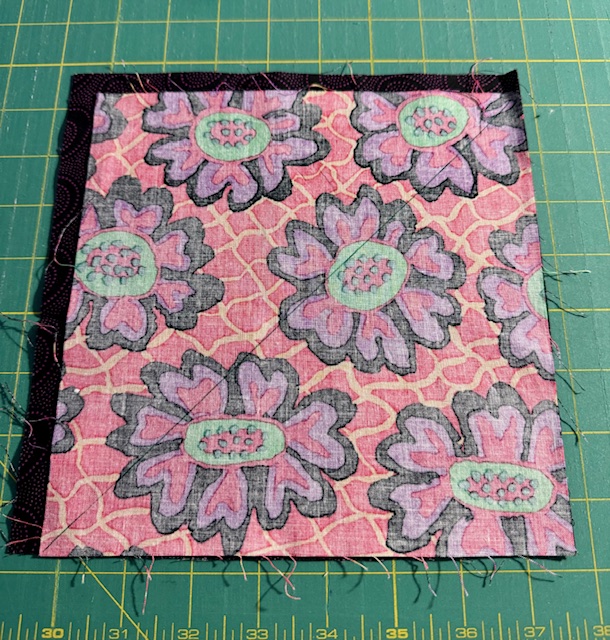
Sew on the drawn line.
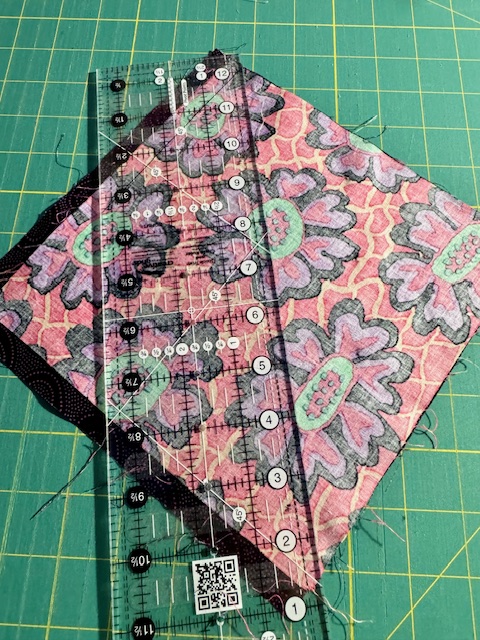
Using the 3.5″ x 12.5″ ruler, align the sewn line with a 1/4″ mark on the ruler. Trim the fabric, leaving a 1/4″ seam allowance.
Reserve the trimmed pieces for another use. The glue will hold them together.
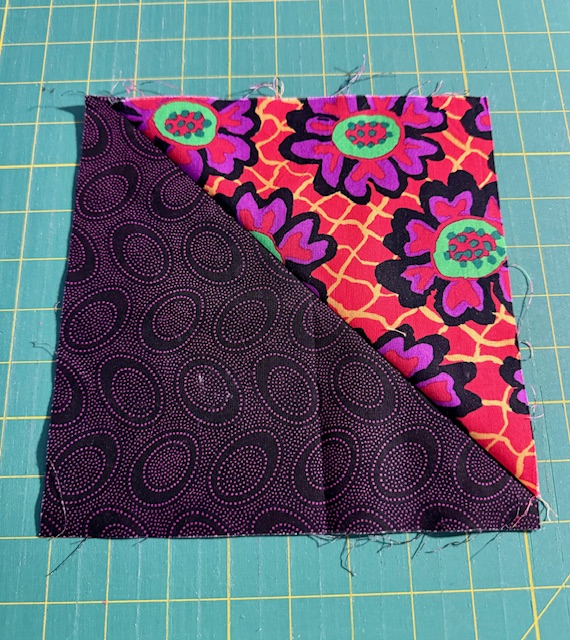
Press the seam, revealing the print fabric. Given you have many squares to cut and press, I recommend a travel iron at your workstation.
Repeat on the opposite side, using another print fabric, aligning the fabrics to the opposite corner and using glue to hold them in place.
Sew on the drawn line, and then trim and press as you did on the first side.
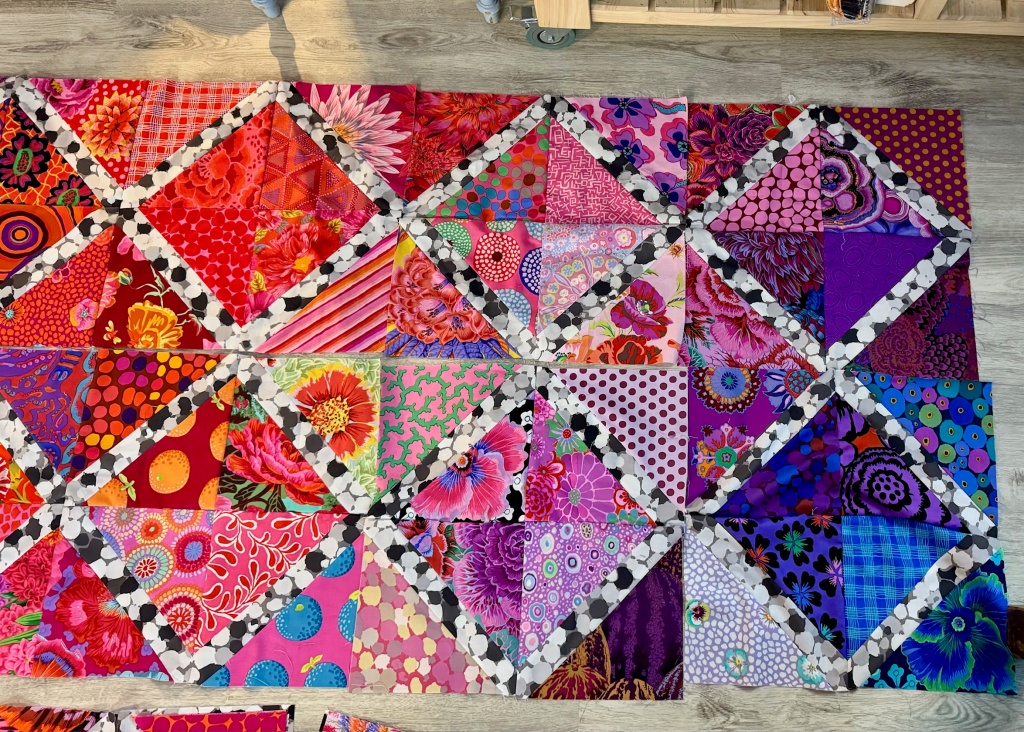
Tada! This is your finished block. Make 132 for a 96″ x 88″ quilt. Each block finishes to 8″ so make the appropriate number for the size you want.
64 blocks will make a nice 64″ throw – lay them out in 8 rows of 8.
120 blocks will make a queen bed quilt that is 80″ x 96″ – lay them out 10 x 12.
196 blocks will make a big king bed quilt that is 112″ x 112″ – lay the out 12 by 12.
A design wall would be helpful in designing this quilt. I started at home and laid out squares as I finished them on the floor to get the color blending to my liking. Once I had a fair number of blocks pieced I put it on a design wall so I could step back and adjust.
While I did a rainbow you could do a gradient from the center out, or a monochromatic look. The possibilities are truly endless!
Bonus Squares:
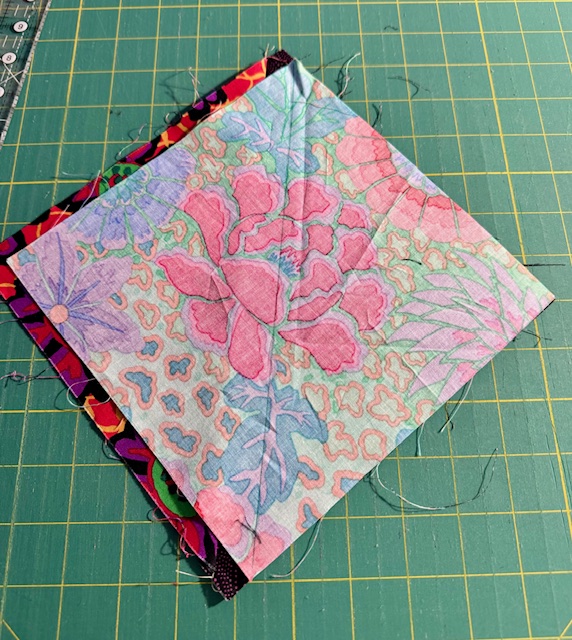
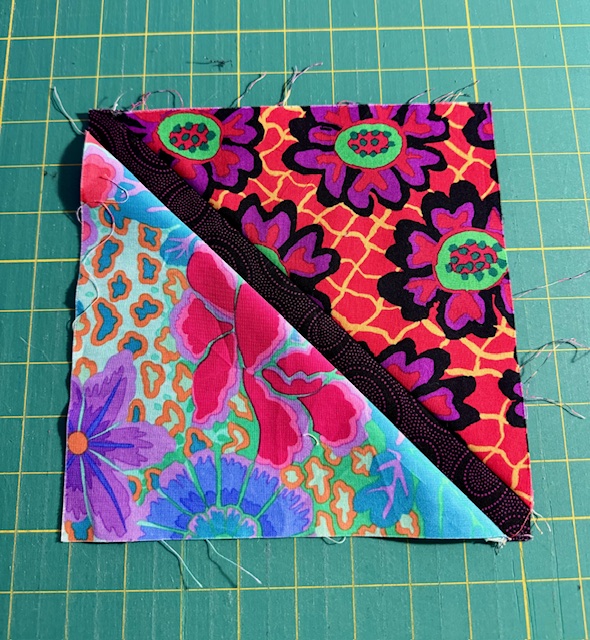
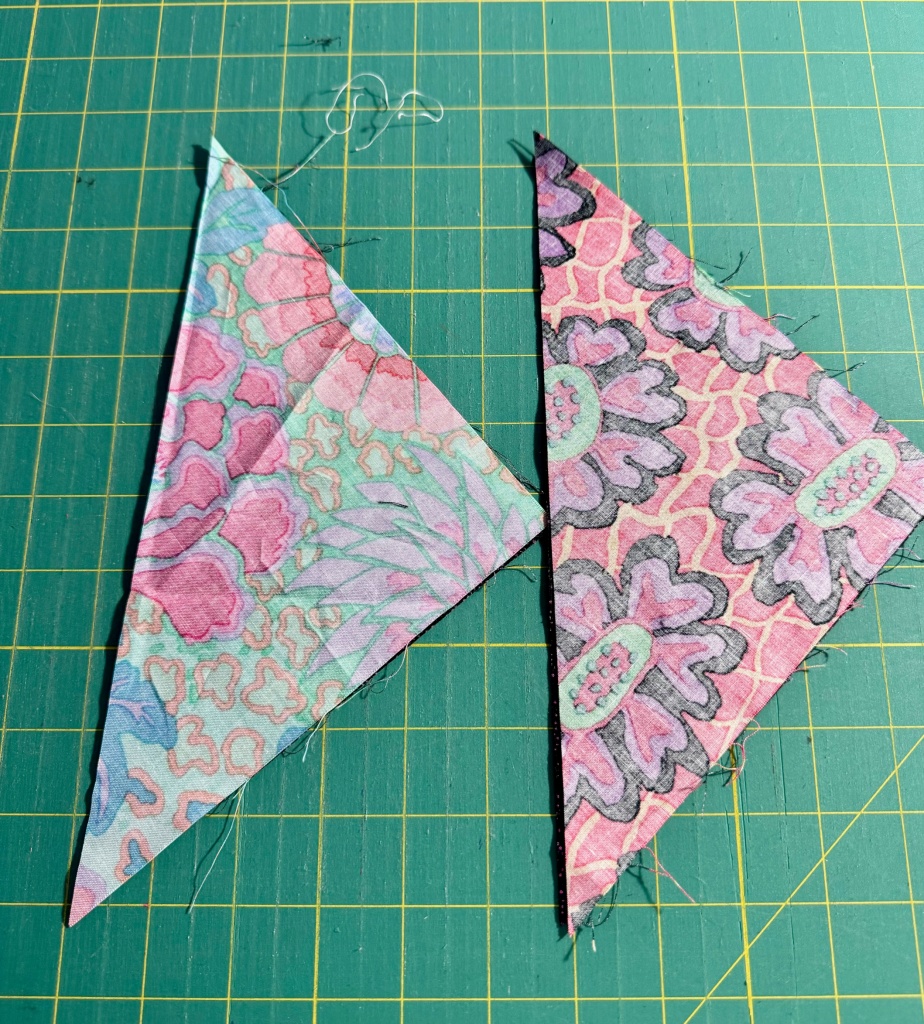
Remember to save the pieces you trim after sewing on the drawn lines. From each block you will end up with two pieces as shown to the right. Once you press them open, you’ll have Half-Square Triangles HST that can be used for another project! Just be sure to trim and square them to a consistent size.
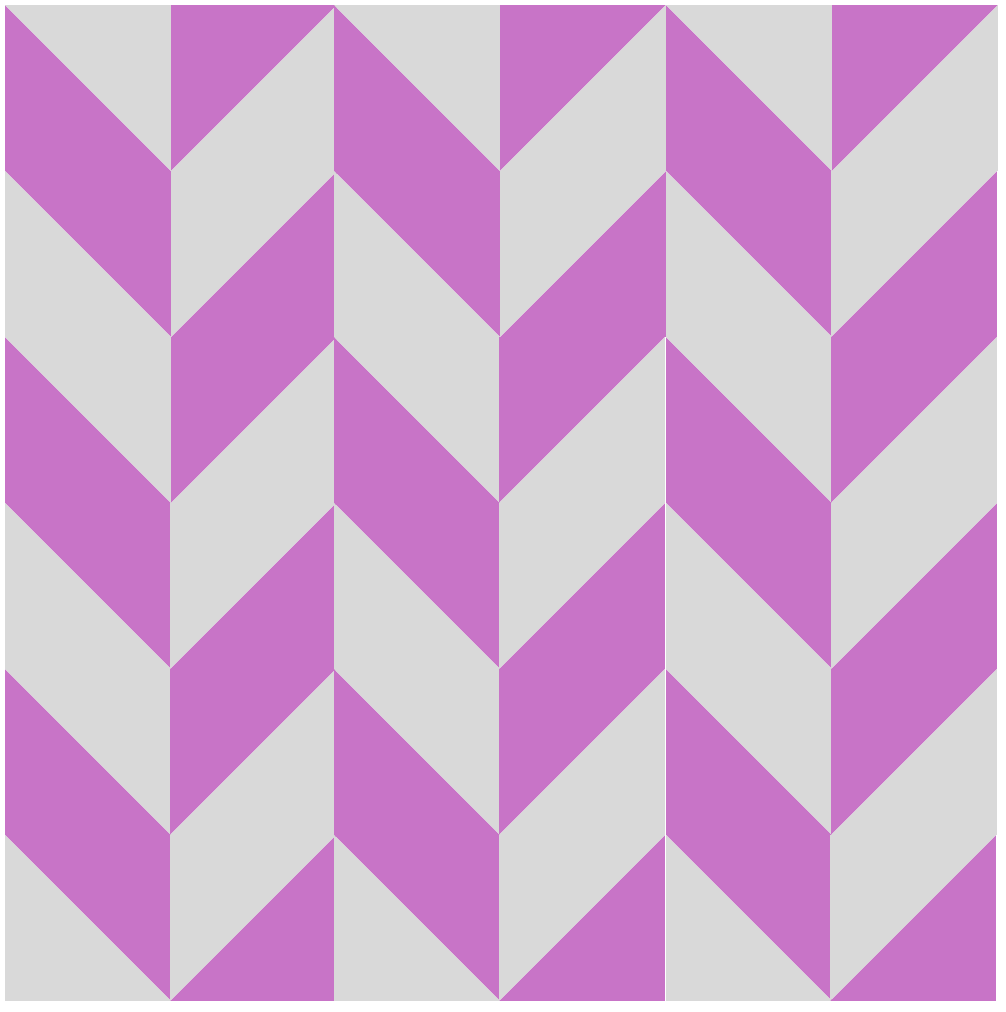
When it comes to HSTs, there are so many different layouts you can create. For example, here is a Chevron pattern that Lori Peck stitched for us. She used 100 leftover squares in 10 rows of 10.
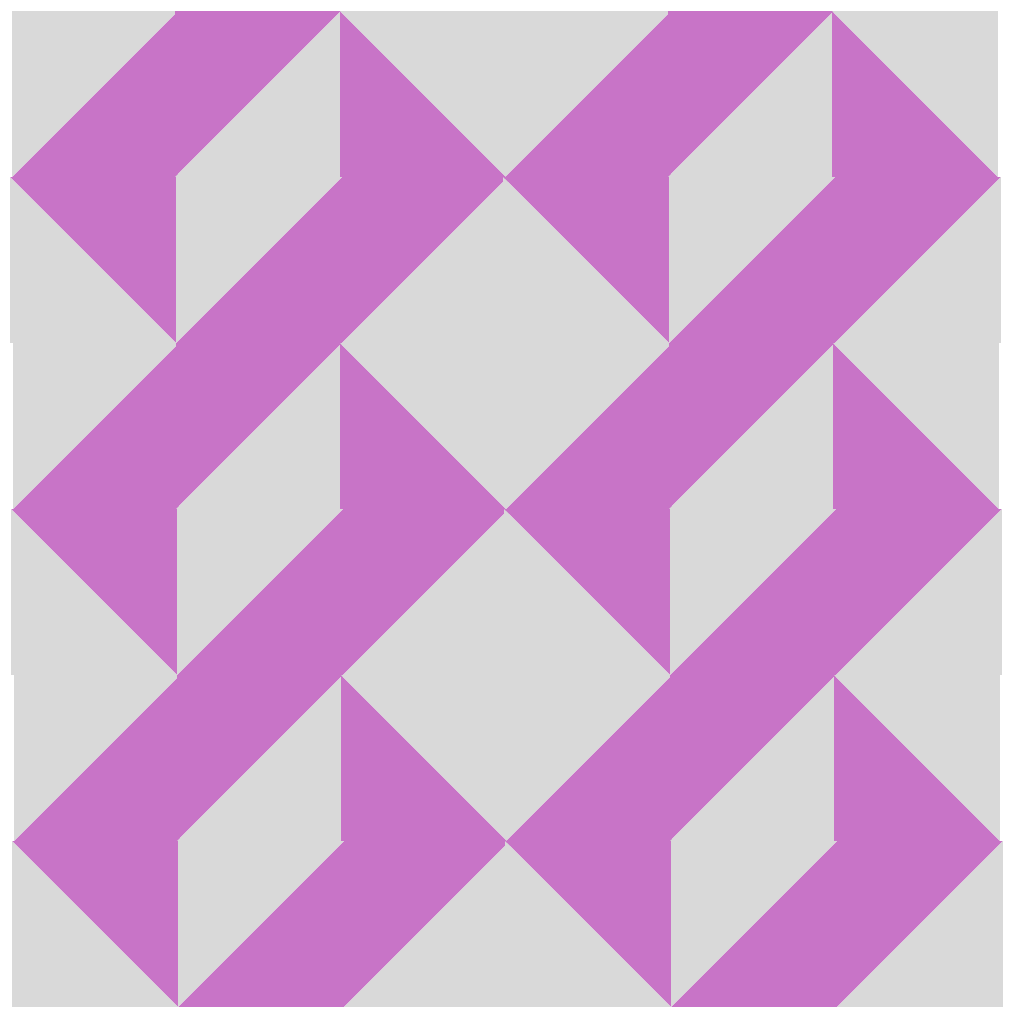
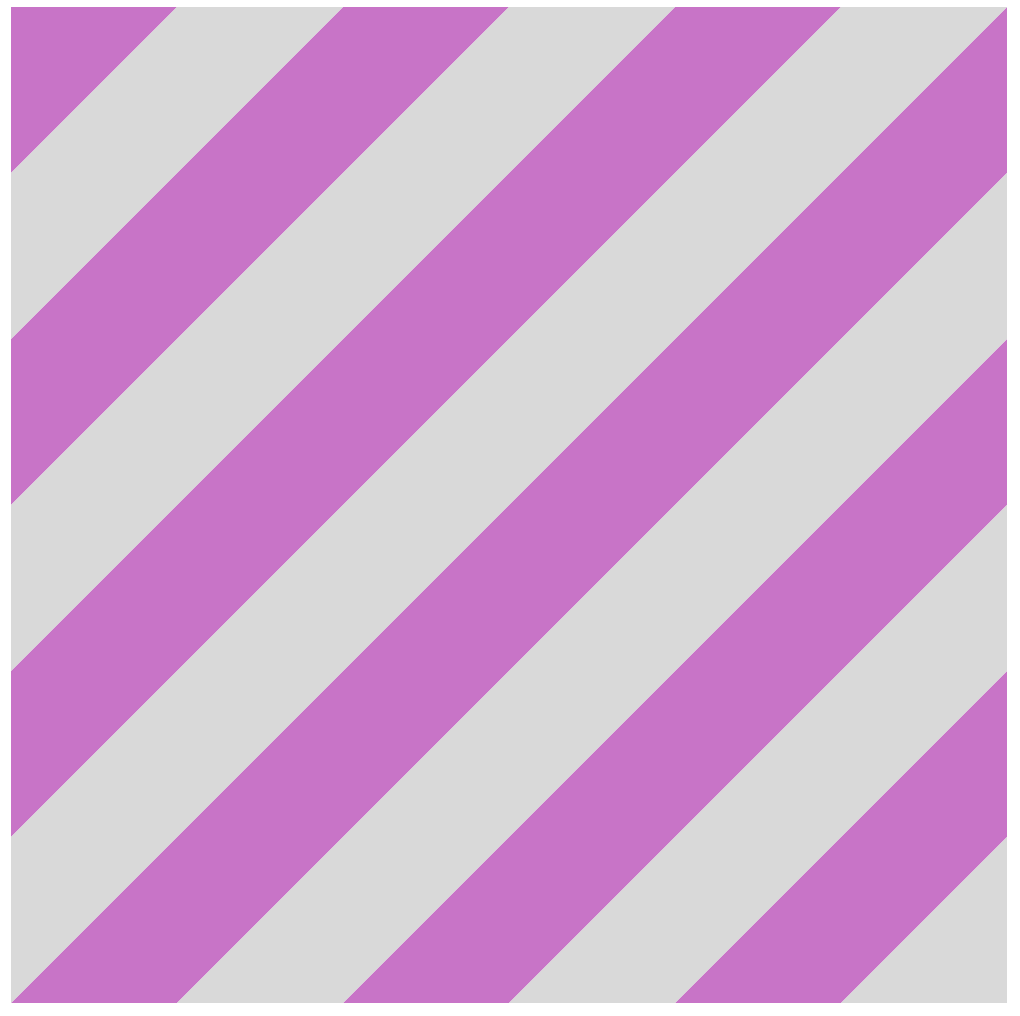
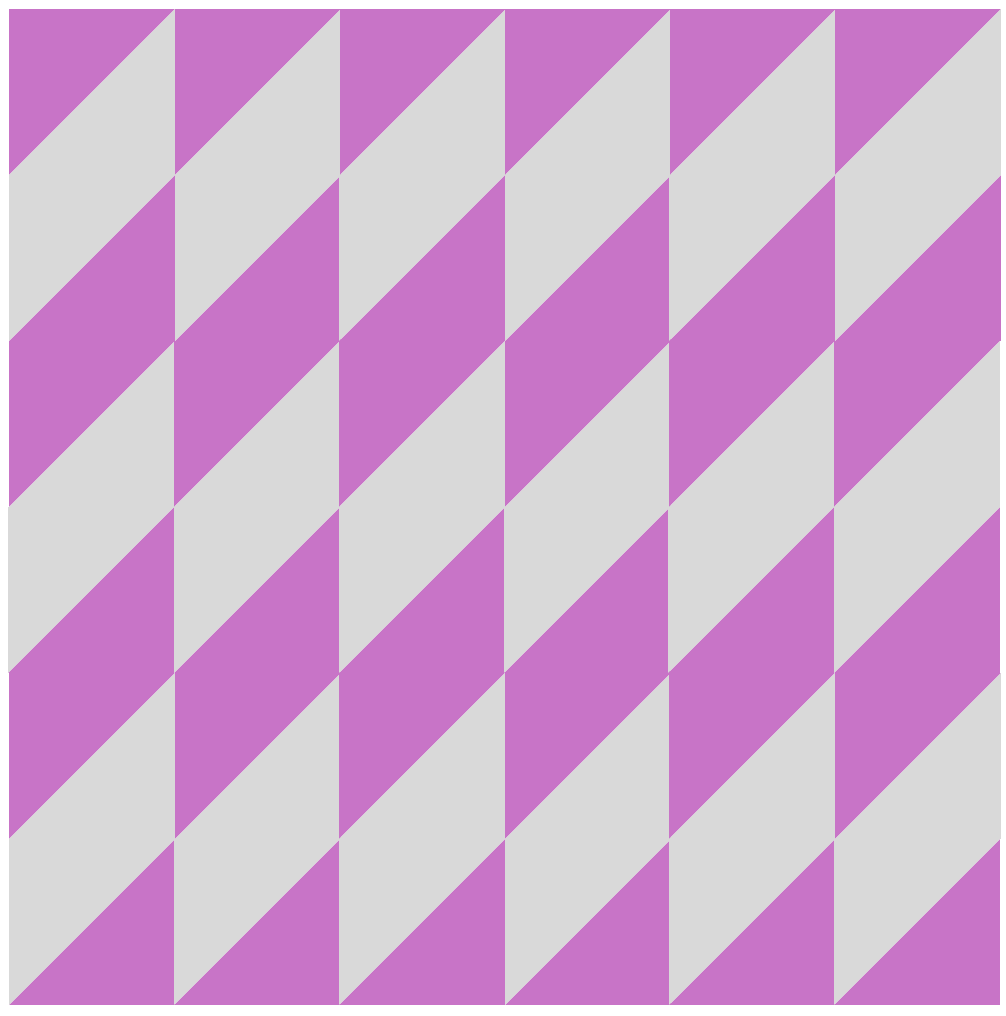
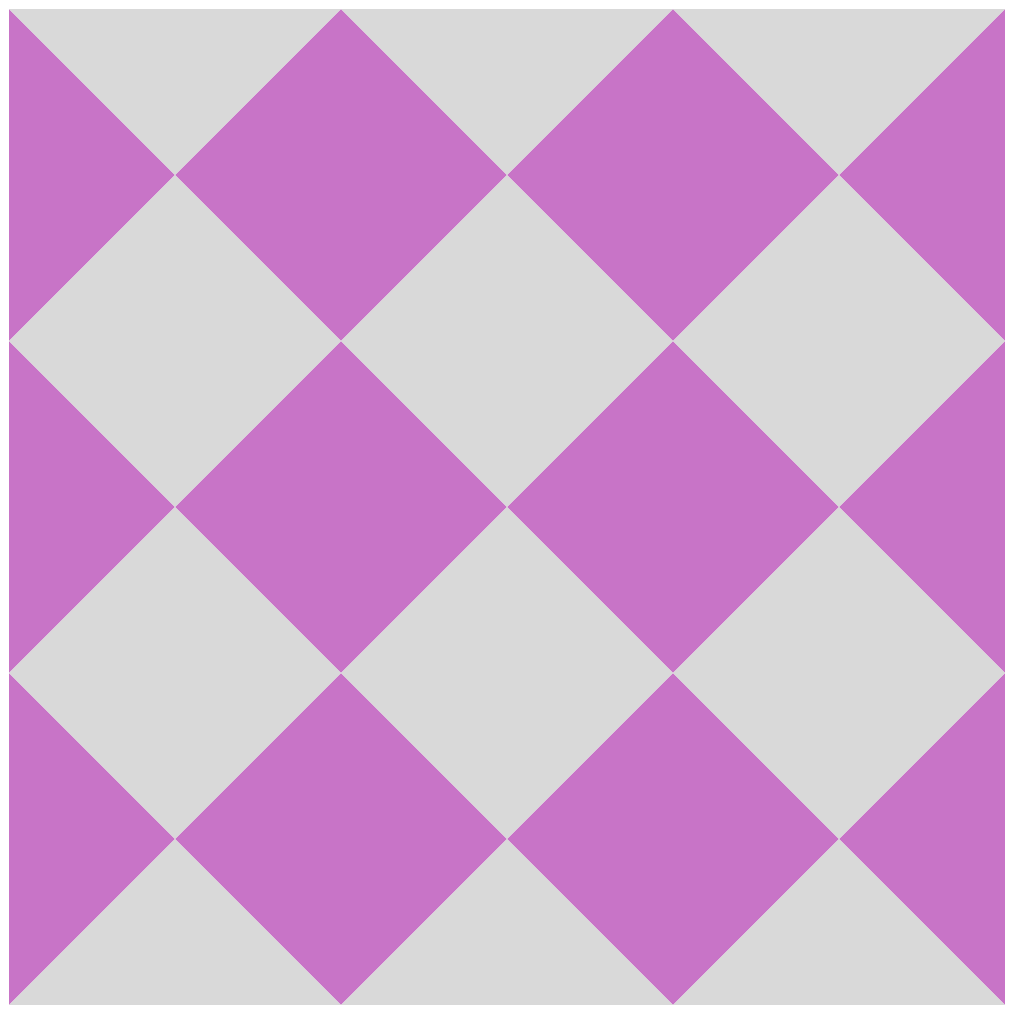
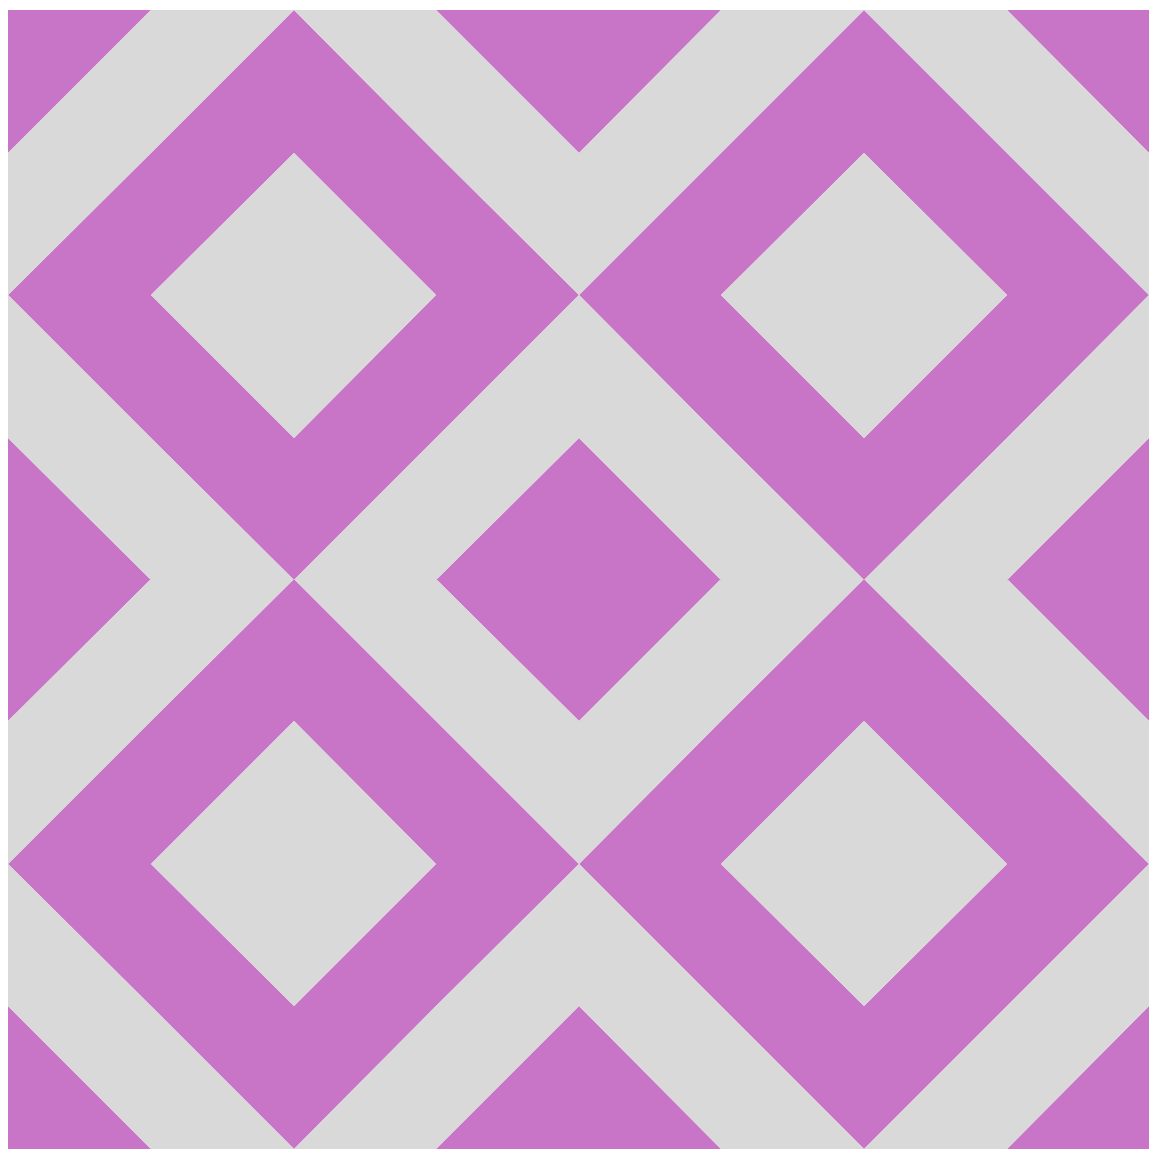
Here are a few layout ideas for your consideration, all made from the leftover pieces from making the main quilt. The gray in these images represents the background, and the pink represents the focus prints.
L-R top row: Chevron, Herringbone, Chain Link. That one also looks like a ribbon wrapped around a pole.
L-R middle row: Diagonal lines, Harlequin, Diamonds. My niece Caitlyn is quilting hers using this pattern now, made from leftover squares from the first quilt.
Bottom row: My favorite, Boxy. I love how awesome this one looks. Caitlyn is piecing this version, still using squares from our original quilt. This one does 16 squares to make one full box, so you do need to plan accordingly when doing your layout.
These are so much fun to make. Take your scraps and play with layout ideas!


If you make a Kaffe Lattice quilt, please share photos. Please tag @cottoncandyfabrics on Facebook or @cottoncandyfabricshop on Instagram. And, be sure to use #kaffelatticequilt, #cottoncandyfabrics, #latticequilt so we can see and share your creation!
