

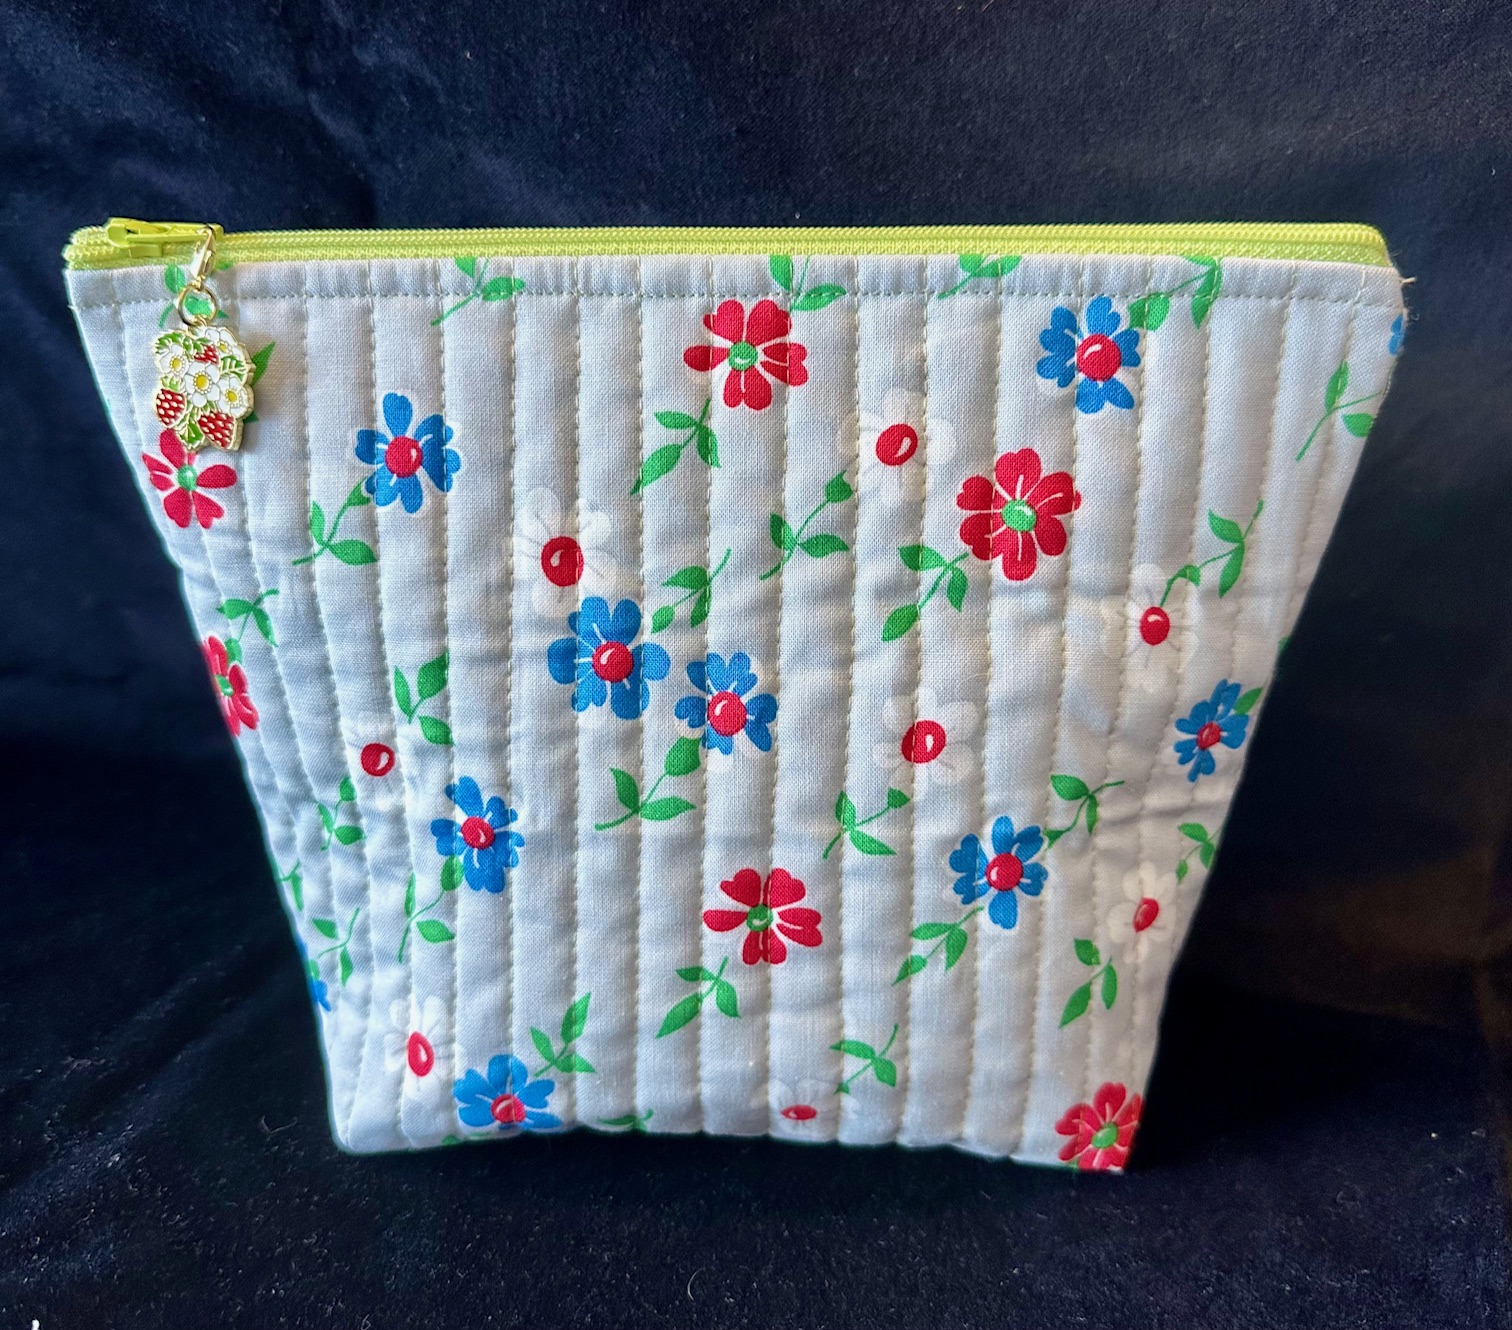
This is a fun zipper pouch that you make in an hour. It finishes to 7″ high x 9″ wide at top; 6 1/5″ wide at bottom, and 3″ deep and makes a great cosmetics bag, pencil case, or cord holder.
Note: This bag uses one fat quarter for the exterior and lining of the bag. If you want a different lining you will need (2) 10″ x 18″ pieces of fabric.
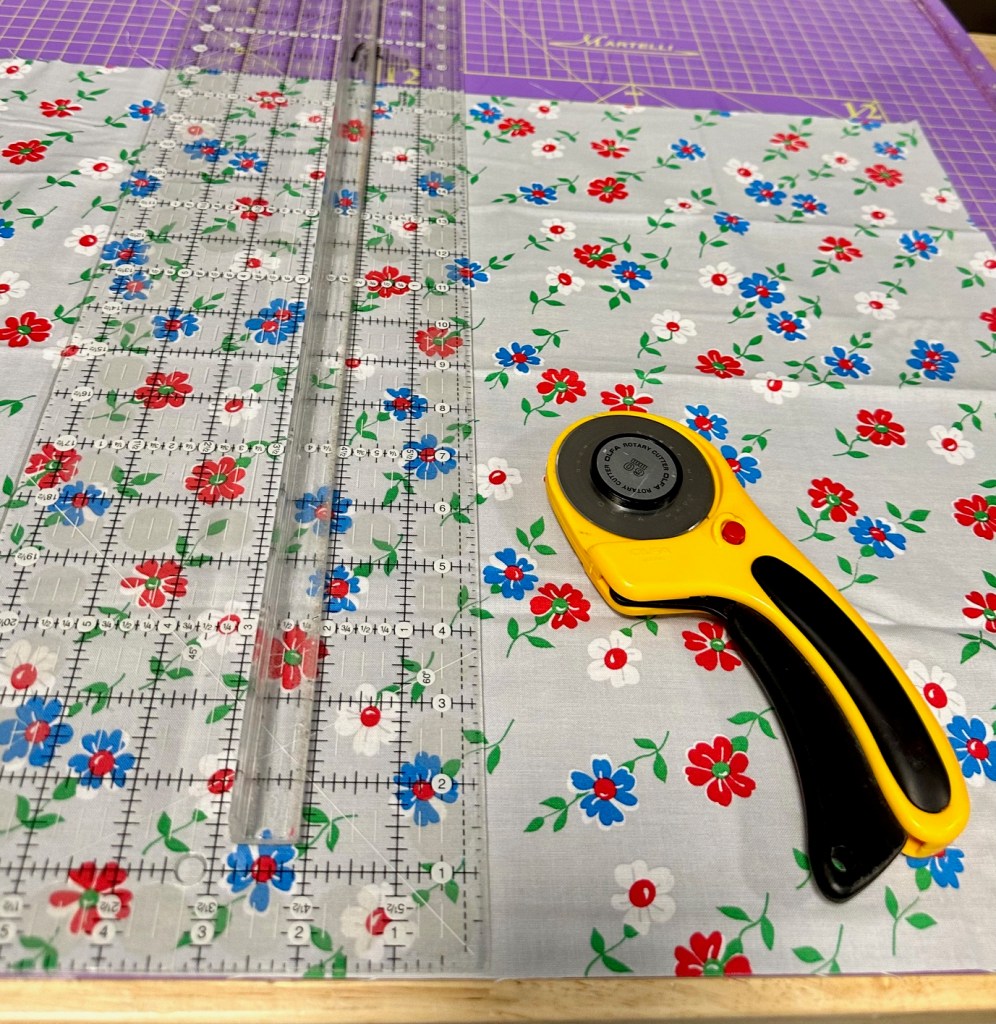
Cut your fat quarter into two pieces that each measure 18″ x 10″. You may find it helpful to mark one of the pieces with an erasable pencil to denote that side as the lining.
Make a quilt sandwich with the two 10″ x 18″ pieces of fabric and batting and quilt as desired.

Pin or clip one side of the zipper to a 10″ side the pouch, with right sides together, and zipper centered. The zipper will be facing down and will extend past either side of the fabric as shown.
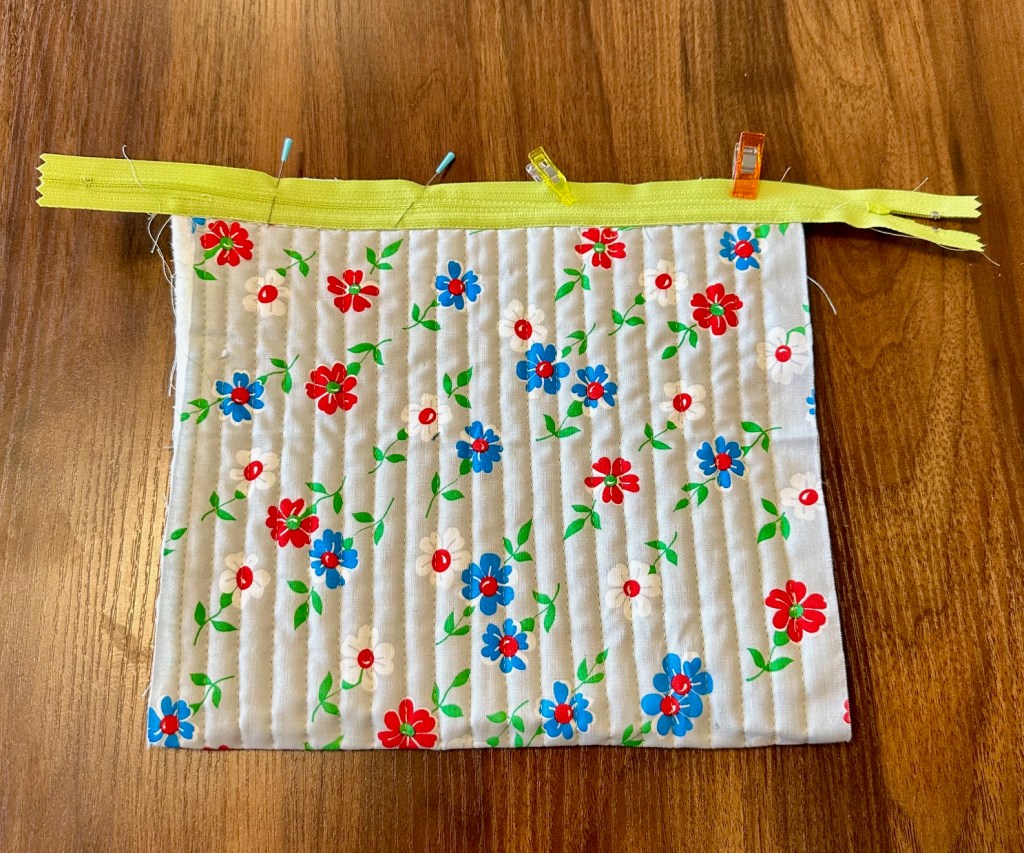
Sew zipper to fabric, using a 1/4″ seam. Finger press zipper tape to lining side of fabric and top stitch on outside of pouch, 1/4″ from zipper. You can move the zipper pull to the side so it doesn’t interfere with sewing a straight seam.
Fold the fabric in half, right sides together, so the unsewn side of the zipper is aligned to the top of the opposite side of the bag. Pin or clip in place. This will form a tube. Make sure the right and left sides of your bag are even.
Sew zipper to fabric, using a 1/4″ seam. Turn bag so it is right side out. Open zipper, then finger press zipper tape to lining side of fabric and top stitch on outside of pouch, 1/4″ from zipper. You will need to open the zipper to topstitch.
Turn the bag wrong side out, and move the zipper pull so it is in the center of the bag. This is very important to ensure you have a working zipper when finished.
Sew down the sides of the bag using a 1/4″ seam, being sure to sew across the zipper to secure it in place. You may want to reinforce the zipper by sewing over it more than once. Trim excess zipper pieces.

Lay bag flat, and mark and then cut a 1 1/2″ square through both sides of the bag on the bottom two corners.
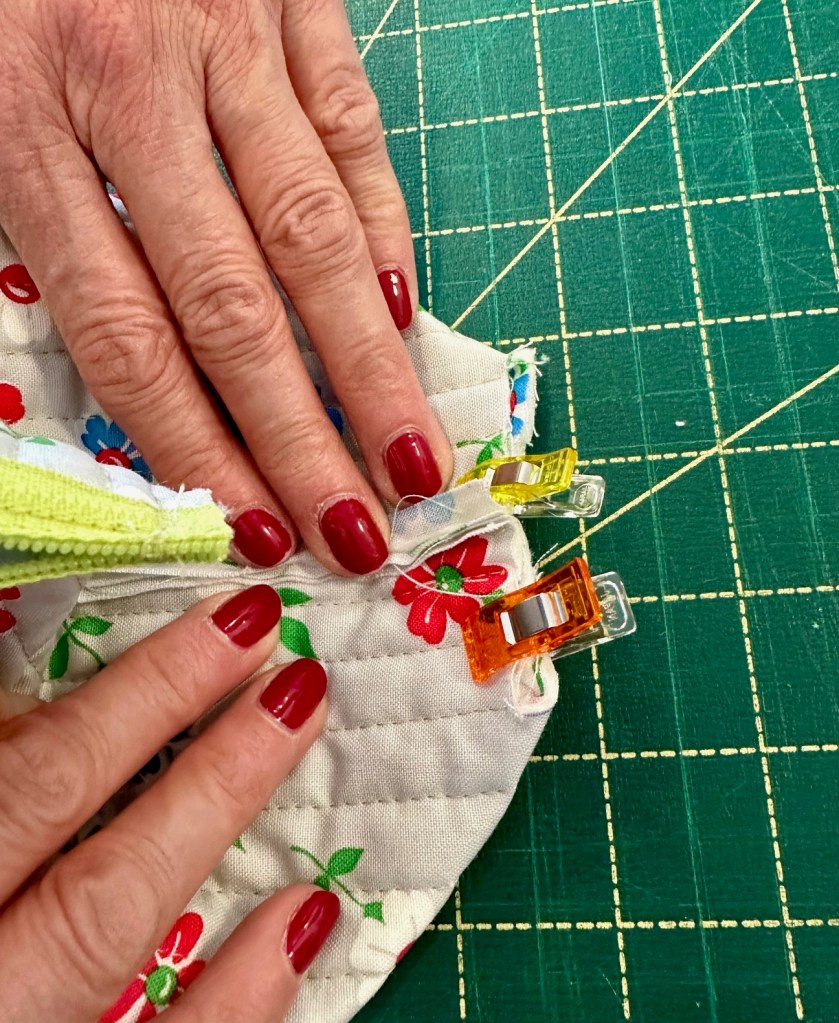
Box your corners by pulling the fabric so the side seam meets the bottom fold. Sew across the pulled fabric, creating your boxed corner. Repeat for the other corner.
Turn the bag right side out and enjoy.
Be sure to check our stock of fun zipper pulls to embellish your bag!
Optional Finishing:
If desired cut a strip of coordinating fabric that measures 2 1/4″ by 16″ and make a binding. You can use this binding to bind your inside seams so raw edges are covered. Alternatively you use a zig zag stitch on the raw edges to create a finished look.
For additional support, watch our YouTube video on how to make this pouch at https://www.youtube.com/cottoncandyfabrics.
Please let us know if you make this fun bag and tag us on social media!
