

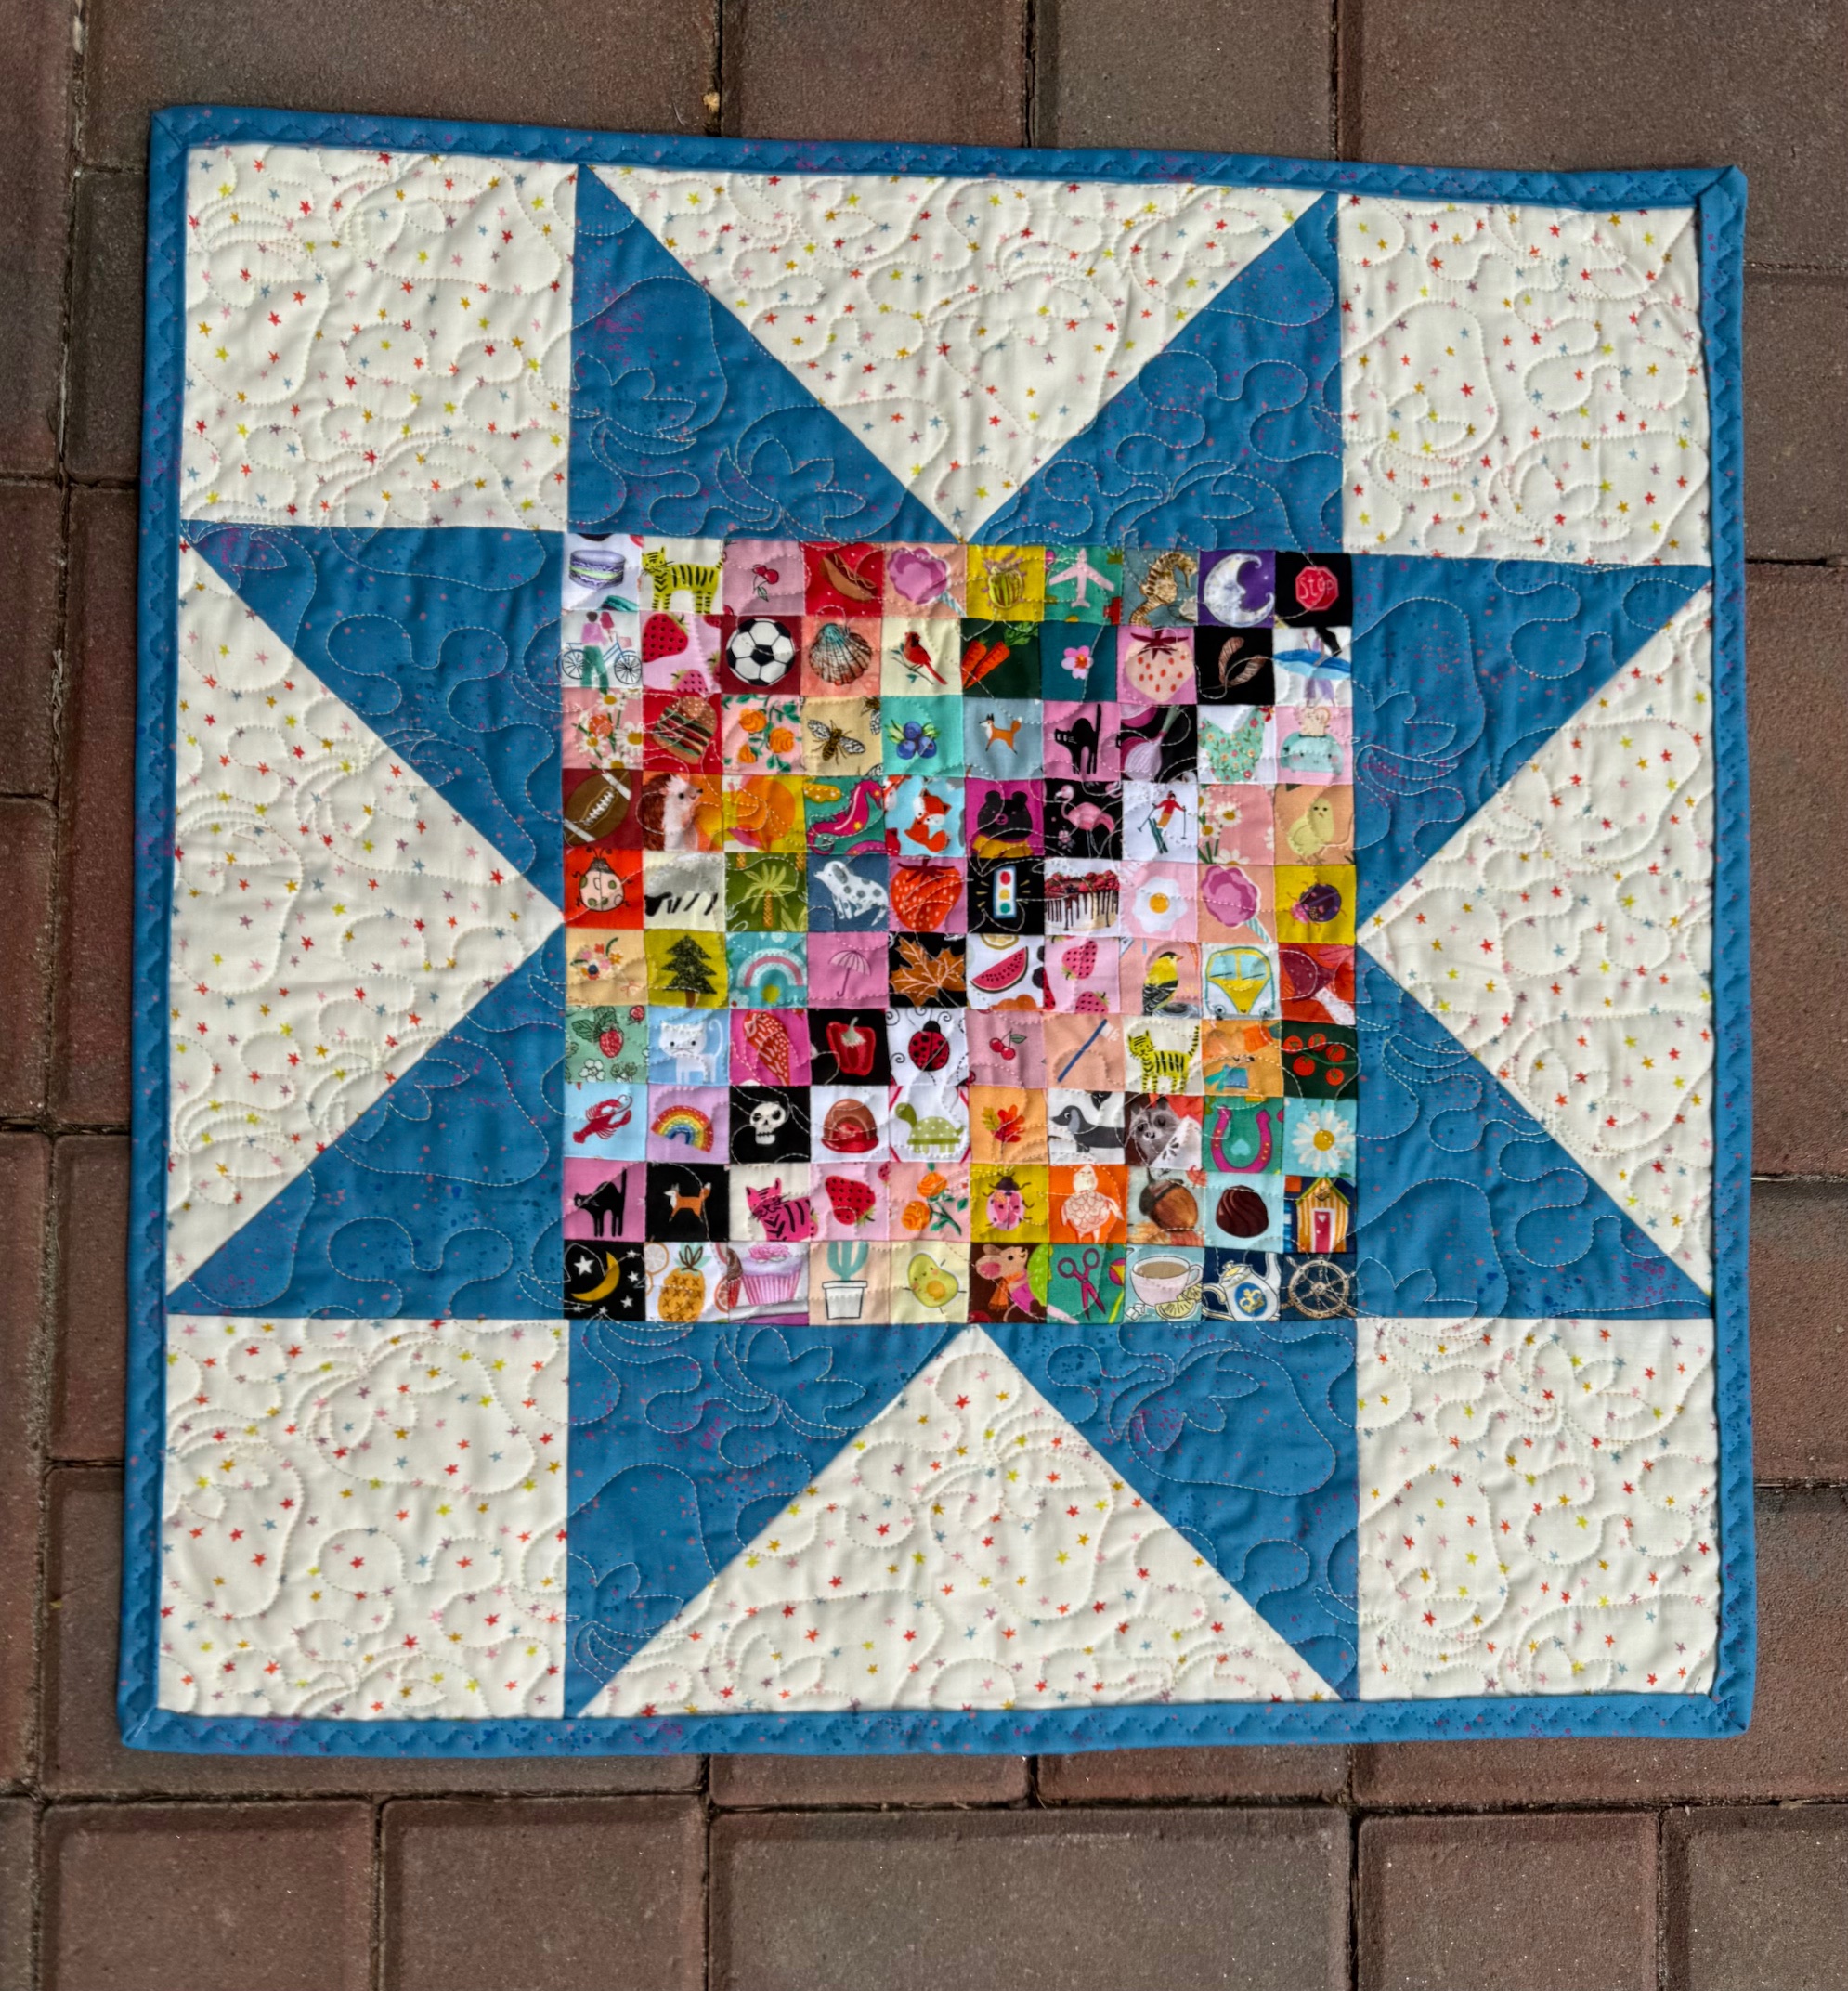
I have been OBSESSED lately with making quilts using 1.5″ squares. They go together so fast, are fantastic for using scraps, and can be lots of fun things. Make a mini quilt, mug rug, placemat, play mat, zipper pouch or small bag – to name a few ideas. Here is how I make them and the tools that I use!
Gather Your Supplies
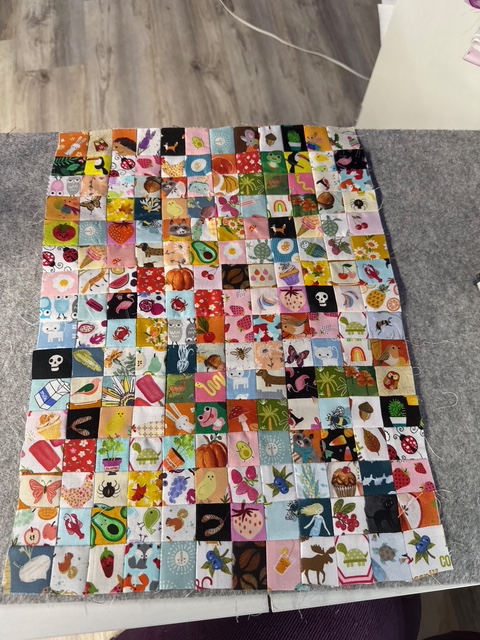
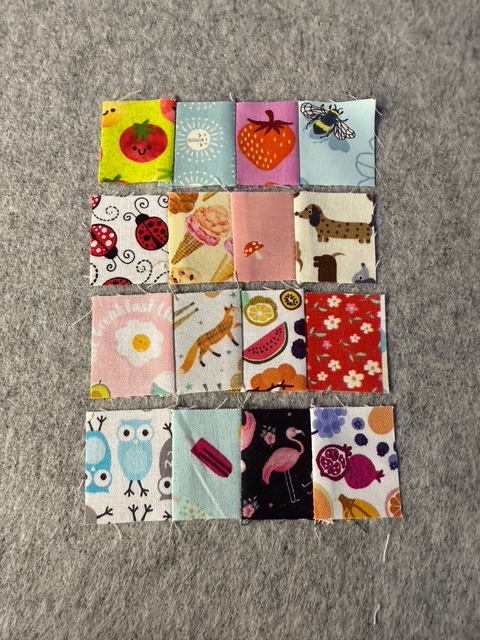
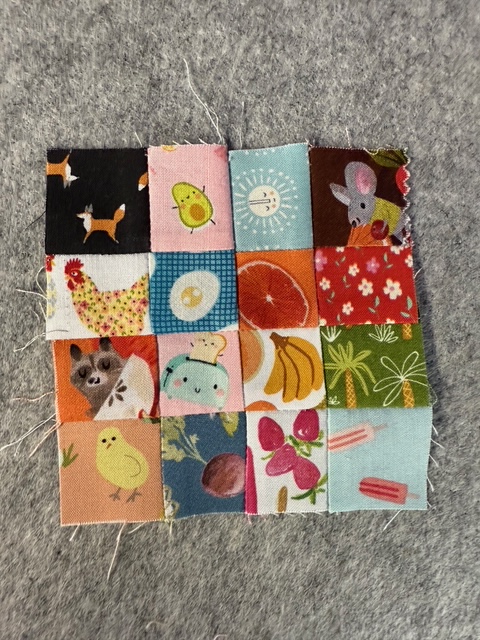
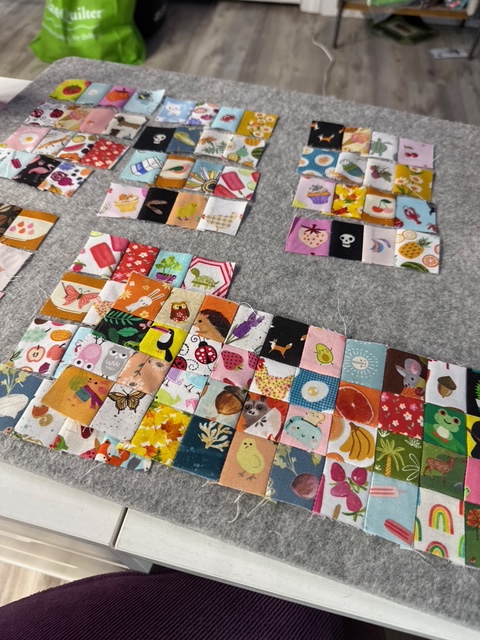
You’ll want to gather a bunch of small scale prints with interesting subjects. You don’t need much of any. I save leftovers from projects in a basket in my sewing room and start cutting when I have enough. To make the star mini quilt you will need 100 1.5″ squares.
To make the star shown above you will need supplemental fabric:
– 1/3 yard background fabric
– FQ of fabric for points of your stars
– 2/3 yard of fabric for back and binding
– scrap batting
You’ll also want a rotary cutter, ideally 28mm, a cutting mat, a small ruler, your sewing machine with neutral thread.
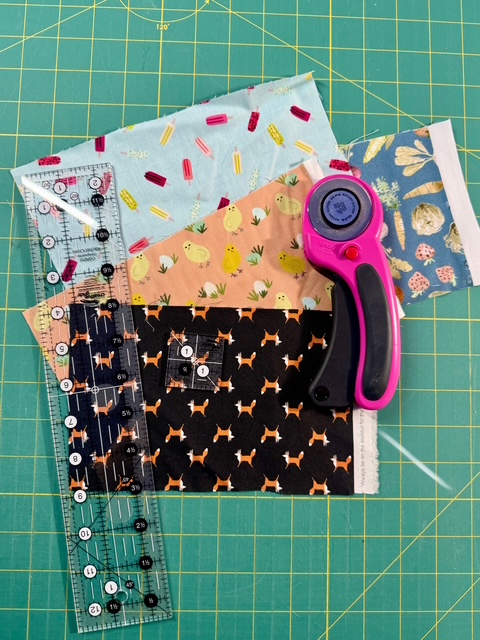
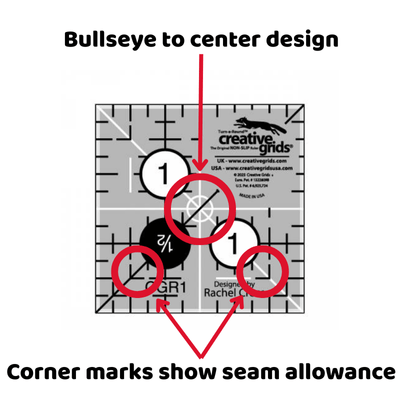
You will also want a Creative Grids 1.5″ square ruler. This ruler makes it super easy to create your squares and know in advance what you will see. There is a bullseye in the center that you can use to cut your fabric to ensure it is centered. And then there are marks on the bottom that show you what you will see without the seam allowance.
Note: This ruler is 10% off at Cotton Candy Fabrics from May 7 – 11, 2025! Woot!
I like to fussy cut (use my ruler to cut just the part of the fabric I want to see) a bunch of squares. The fabric of fussy cut squares below will show you why I call this a Swiss Cheese Quilt!


After you have a bunch of squares cut, arrange them into a pleasing layout. I created a rainbow-ish gradient, but you can also go completely scrappy. Whatever works for you will create a super cute quilt.
Chain piece your 1.5″ squares into ten rows of ten. Sew your rows together, pressing your seams to opposite sides.
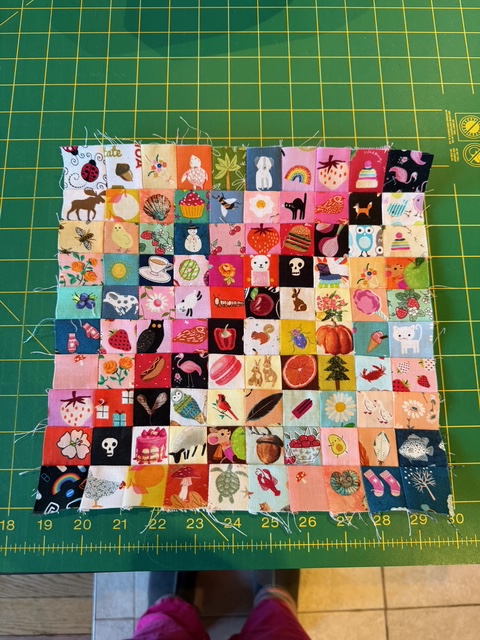
At this point your mini quilt center will measure 10.5″ x 10.5″. If it doesn’t square it up. Then, cut the rest of the fabric to make your top.
From your background fabric, cut:
– (4) 5.5″ x 10.5″ rectangles
– (4) 5.5″ squares
From your star point fabrics, cut:
– (8) 5.5″ squares
Use the Sew and Flip Method to sew a star point to the one side of a 10.5″ x 5.5″ rectangles. Then, repeat on the other side.

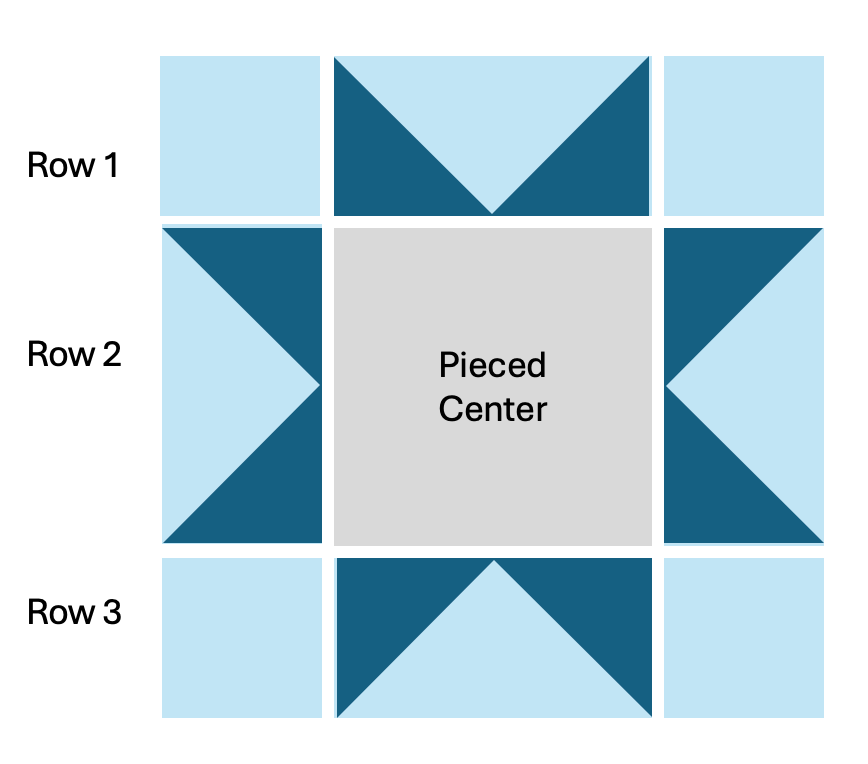
Arrange your mini quilt and sew three rows, pressing seams open.
Then sew your rows together and press well. Starch is your friend at this point!
Quilt and bind as desired. For my Mini Swiss Cheese Star Quilt I quilted a fun strawberry pantograph to keep the whimsical feeling of the quilt intact.
The mini quilt finishes to 20″ square.

This play mat format uses 192 1.5″ squares in a 12 x 16 layout and finishes to 12 inches by 16 inches. Turn it on its side and you have a fun placemat. To create this format I tend to piece squares as leaders and enders when chain piecing other projects. My pairs become rows of four and they become sixteen patches and twelve sixteen patches become a play mat!
Have fun, and stay tuned. I have a few other fun shapes coming, including a Christmas mini quilt and a fun Halloween layout!

I love this! It looks like it would be easy for a beginner. I just bought a new sewing machine and have yet to use it…I think I’m a little afraid of it because it is computerized, lol. I just learned of your shop and look forward to visiting.
Hi Grace, We look forward to meeting you! This is a fun project and will definitely teach you accuracy which is super important in quilting. I am sure you will do great, and we are here to help any way we can!